Having just completed the sliding bevel square. I decided to assemble my best homemade tools for a photo shoot and brief description: a meta notebook entry. These are not the most used nor the most practical, but are the tools that gave me the most pleasure while making them. That includes the machinist's chest the tools are sitting in.
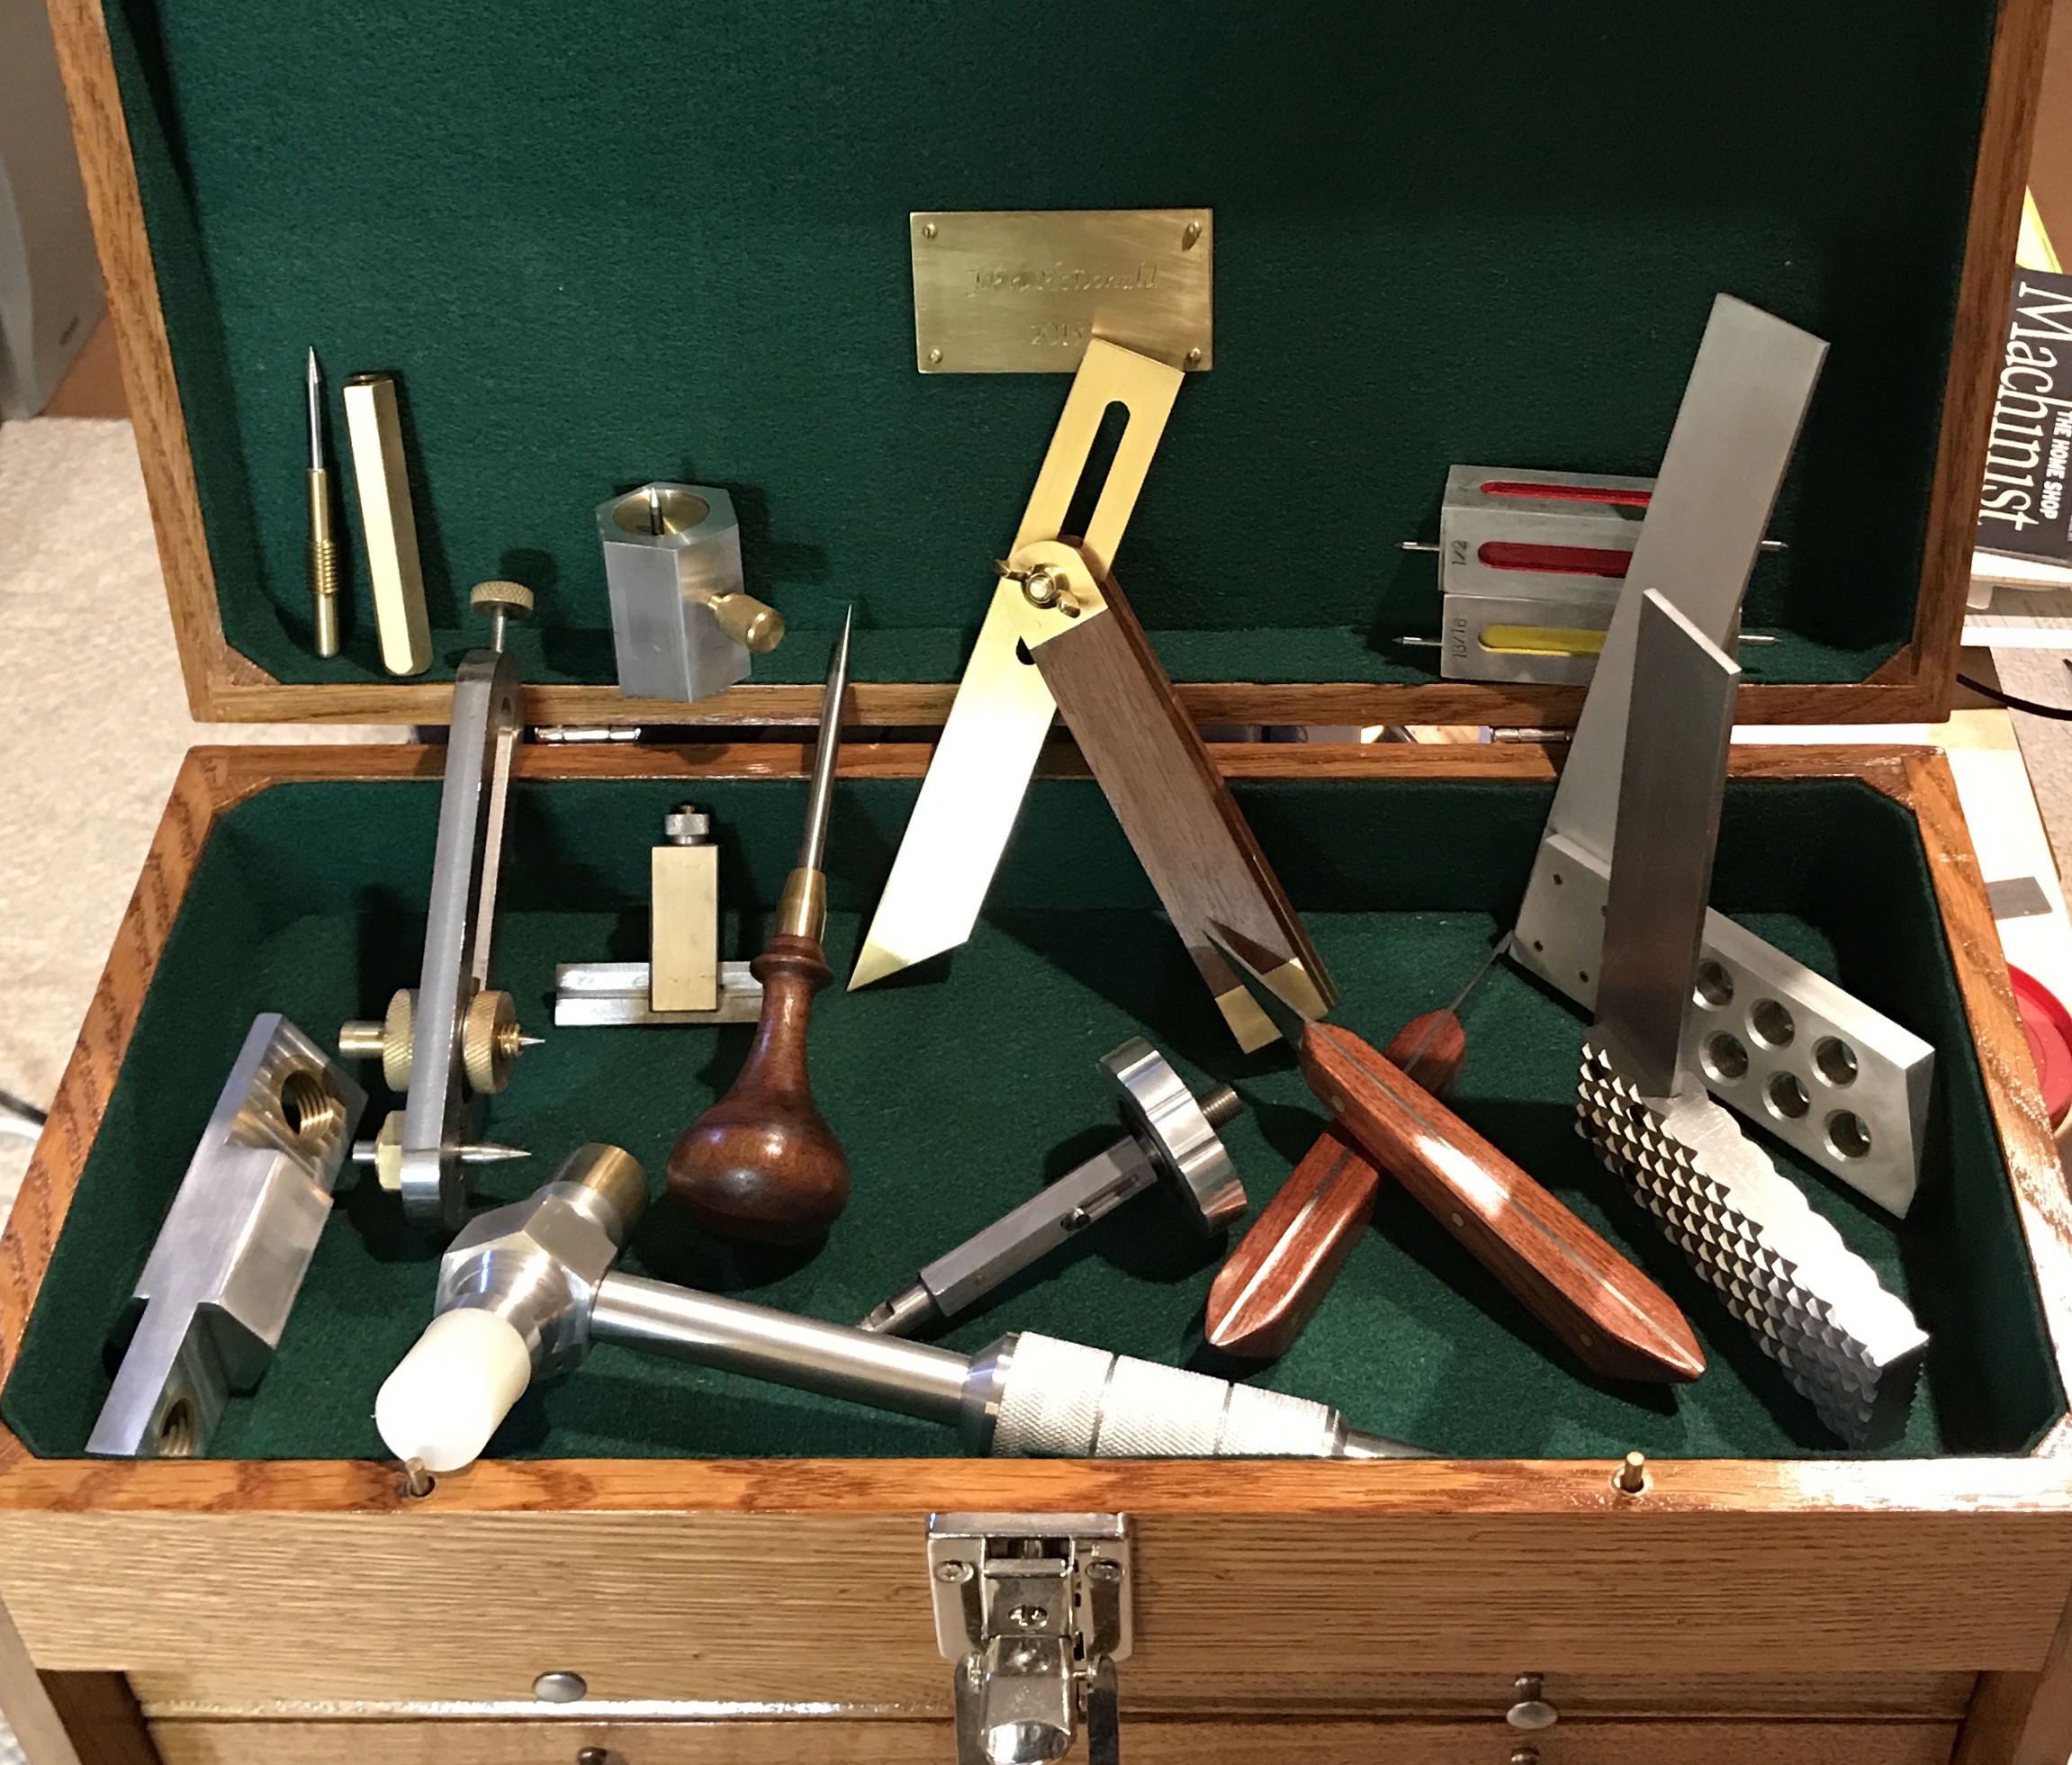
I am also going to add brief descriptions and individual pictures of each tool. I will mention what I enjoyed most about the construction of each. The descriptions will start with the tool in the upper left corner of the picture and proceed in a clockwise spiral.
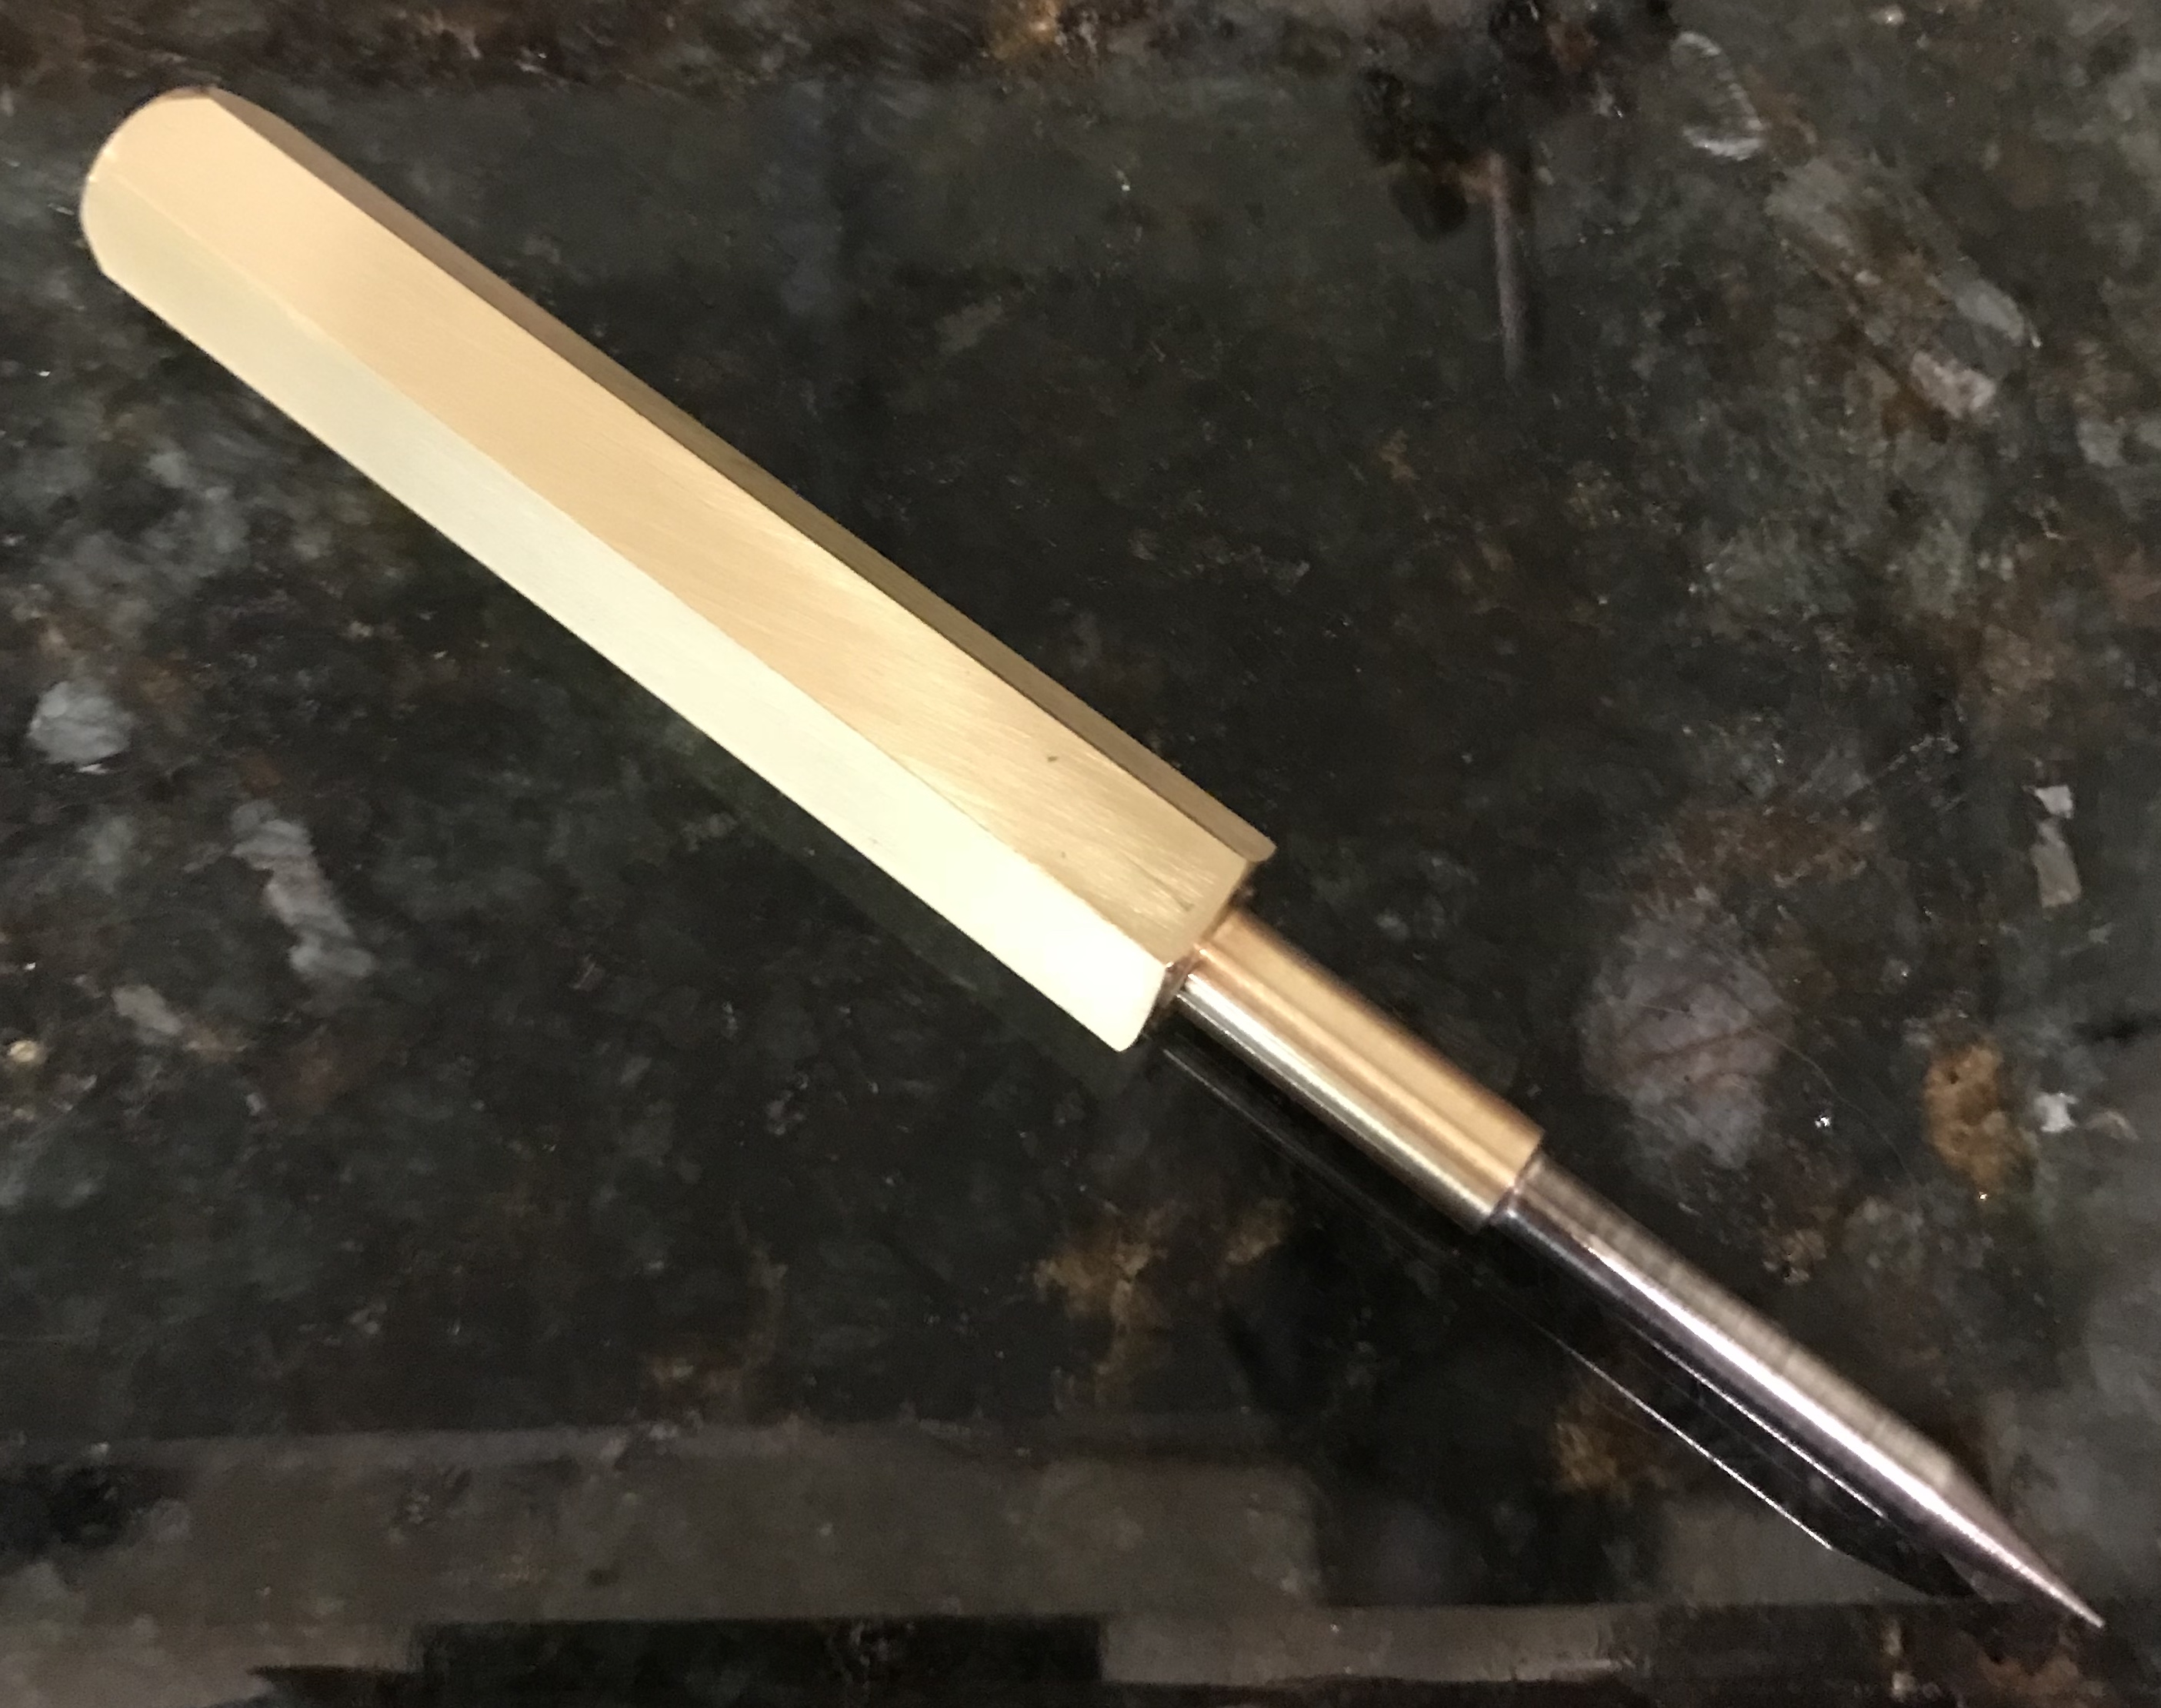
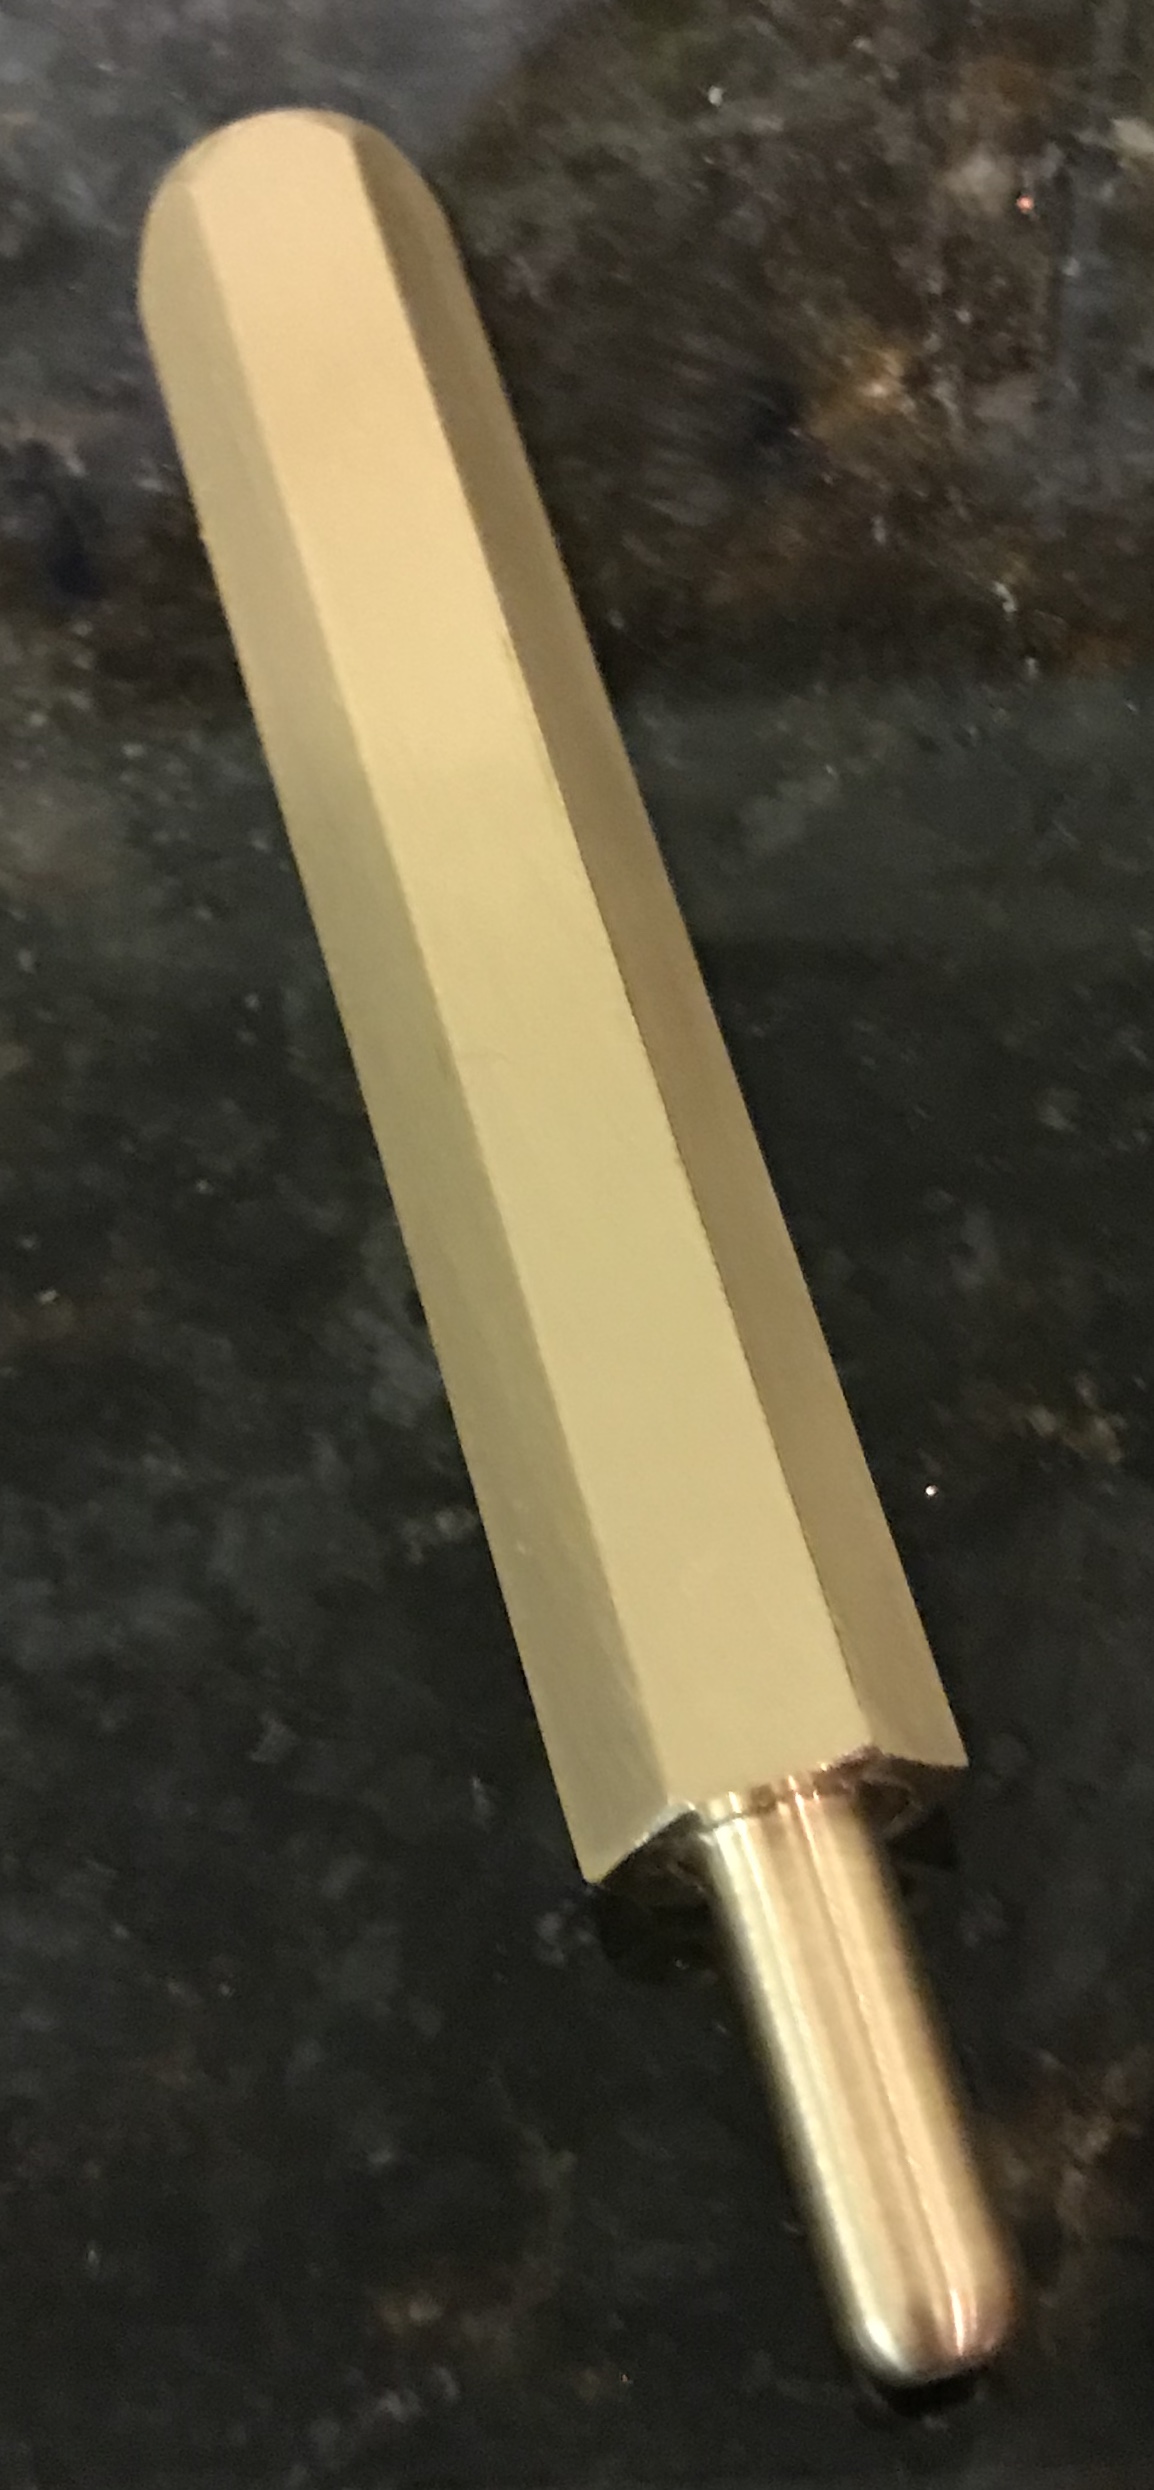
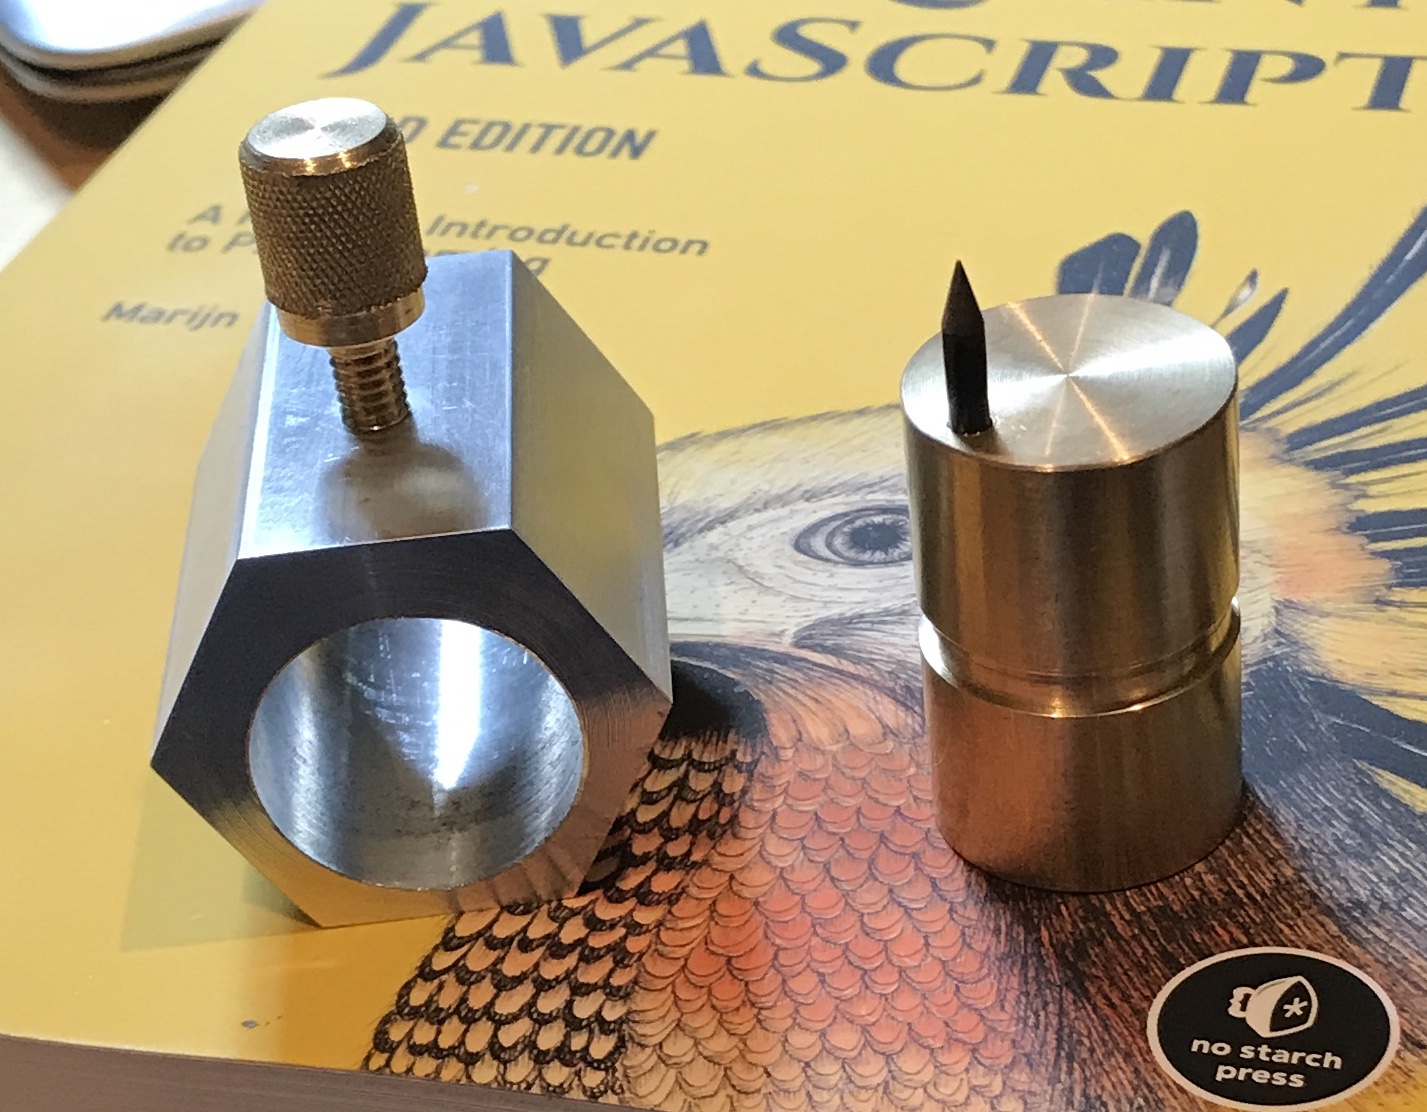
The first tool is a prick punch started in February, 2018. It is used for making a small divot in metal at the point where a hole needs to be drilled. It can also be used for making a scratched line through ink on metal to define the beginning or end of some cutting operation. I liked making the rounded end in the lathe and single pointing the threads on the shaft.
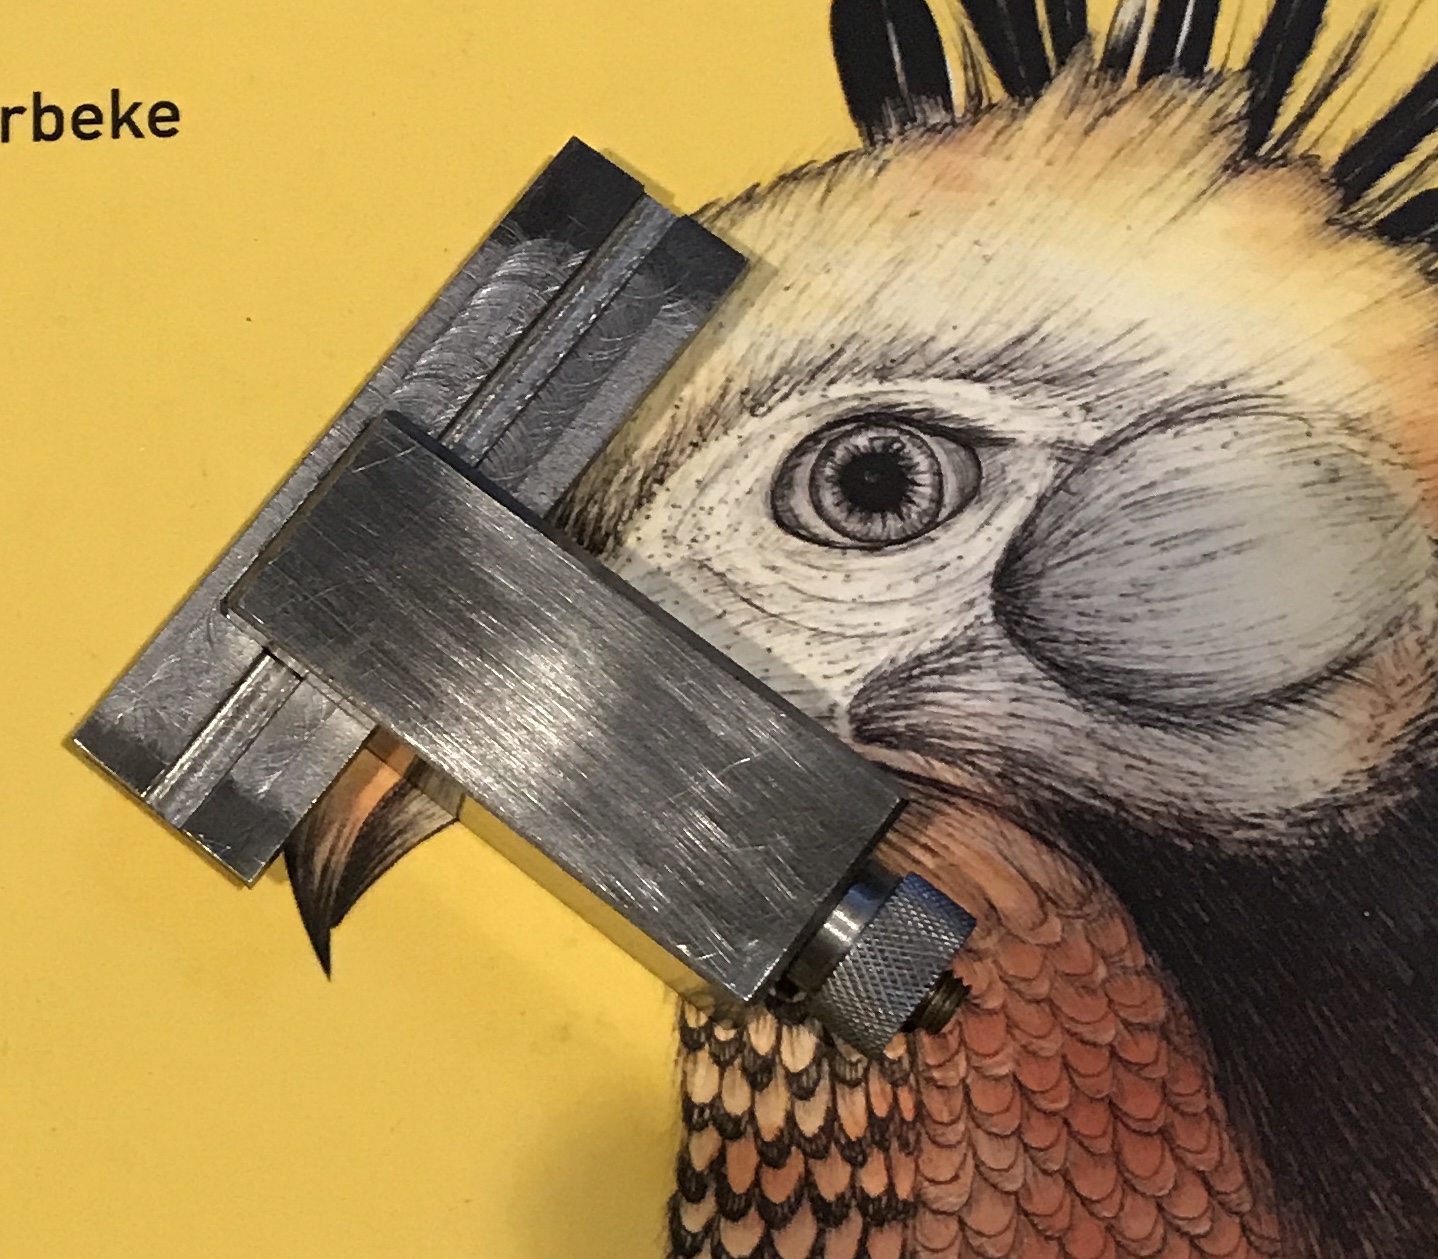
Next is the low profile marking tool (August, 2020). It is also used for making a scratch on metal, that has a coating of ink. It can be easily set to the desired height by rotating the inner cylinder next to a ruler. I am reminded of how nice a fit I achieved between cylinder and inner shaft every time I use this tool.
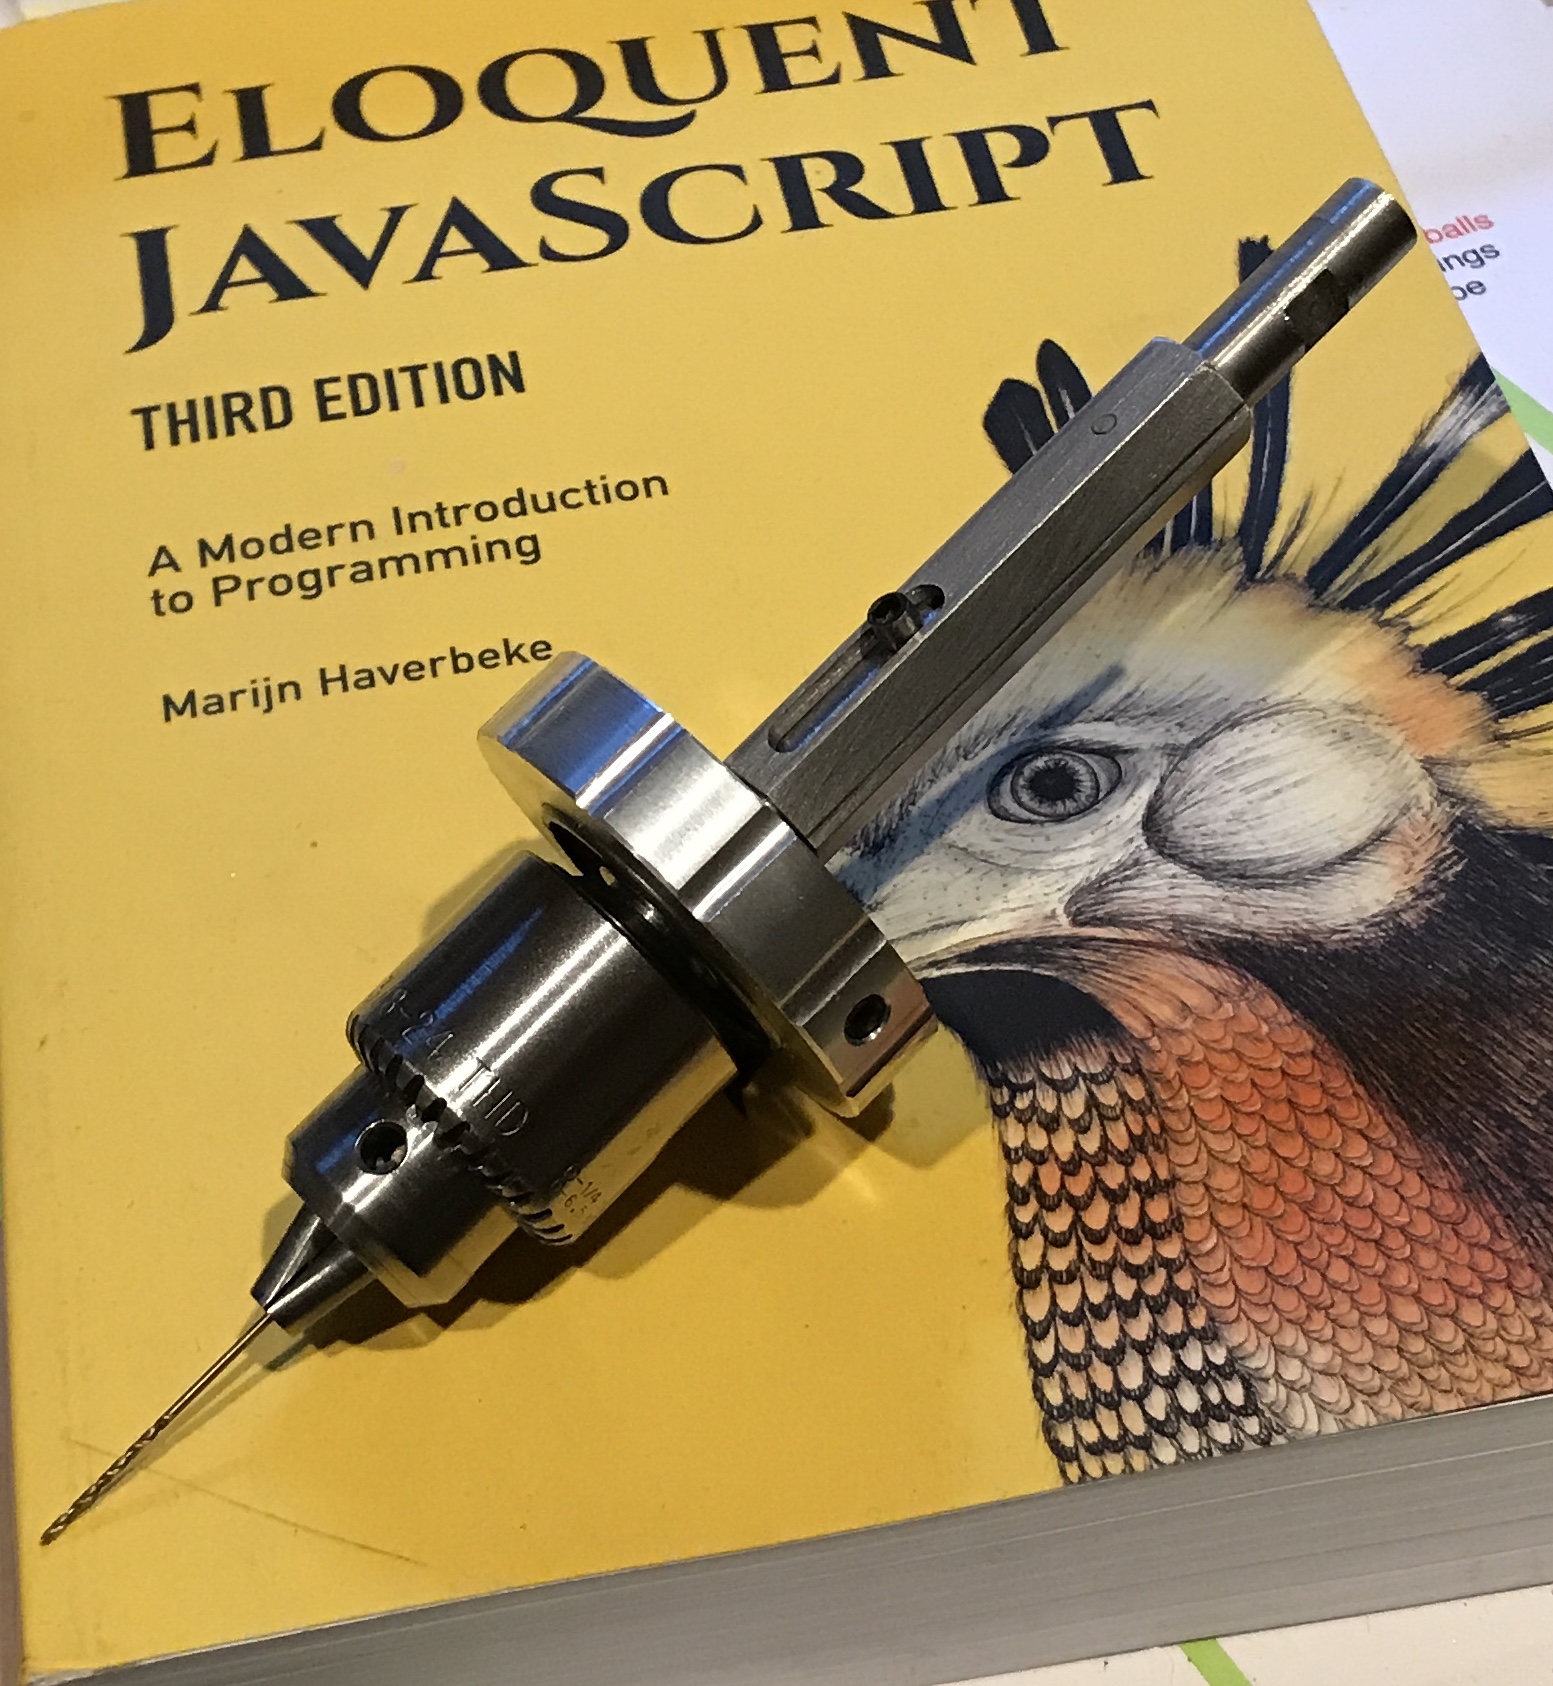
I love the bird on the cover of this JavaScript book.You will see the bird in many of the photos below.
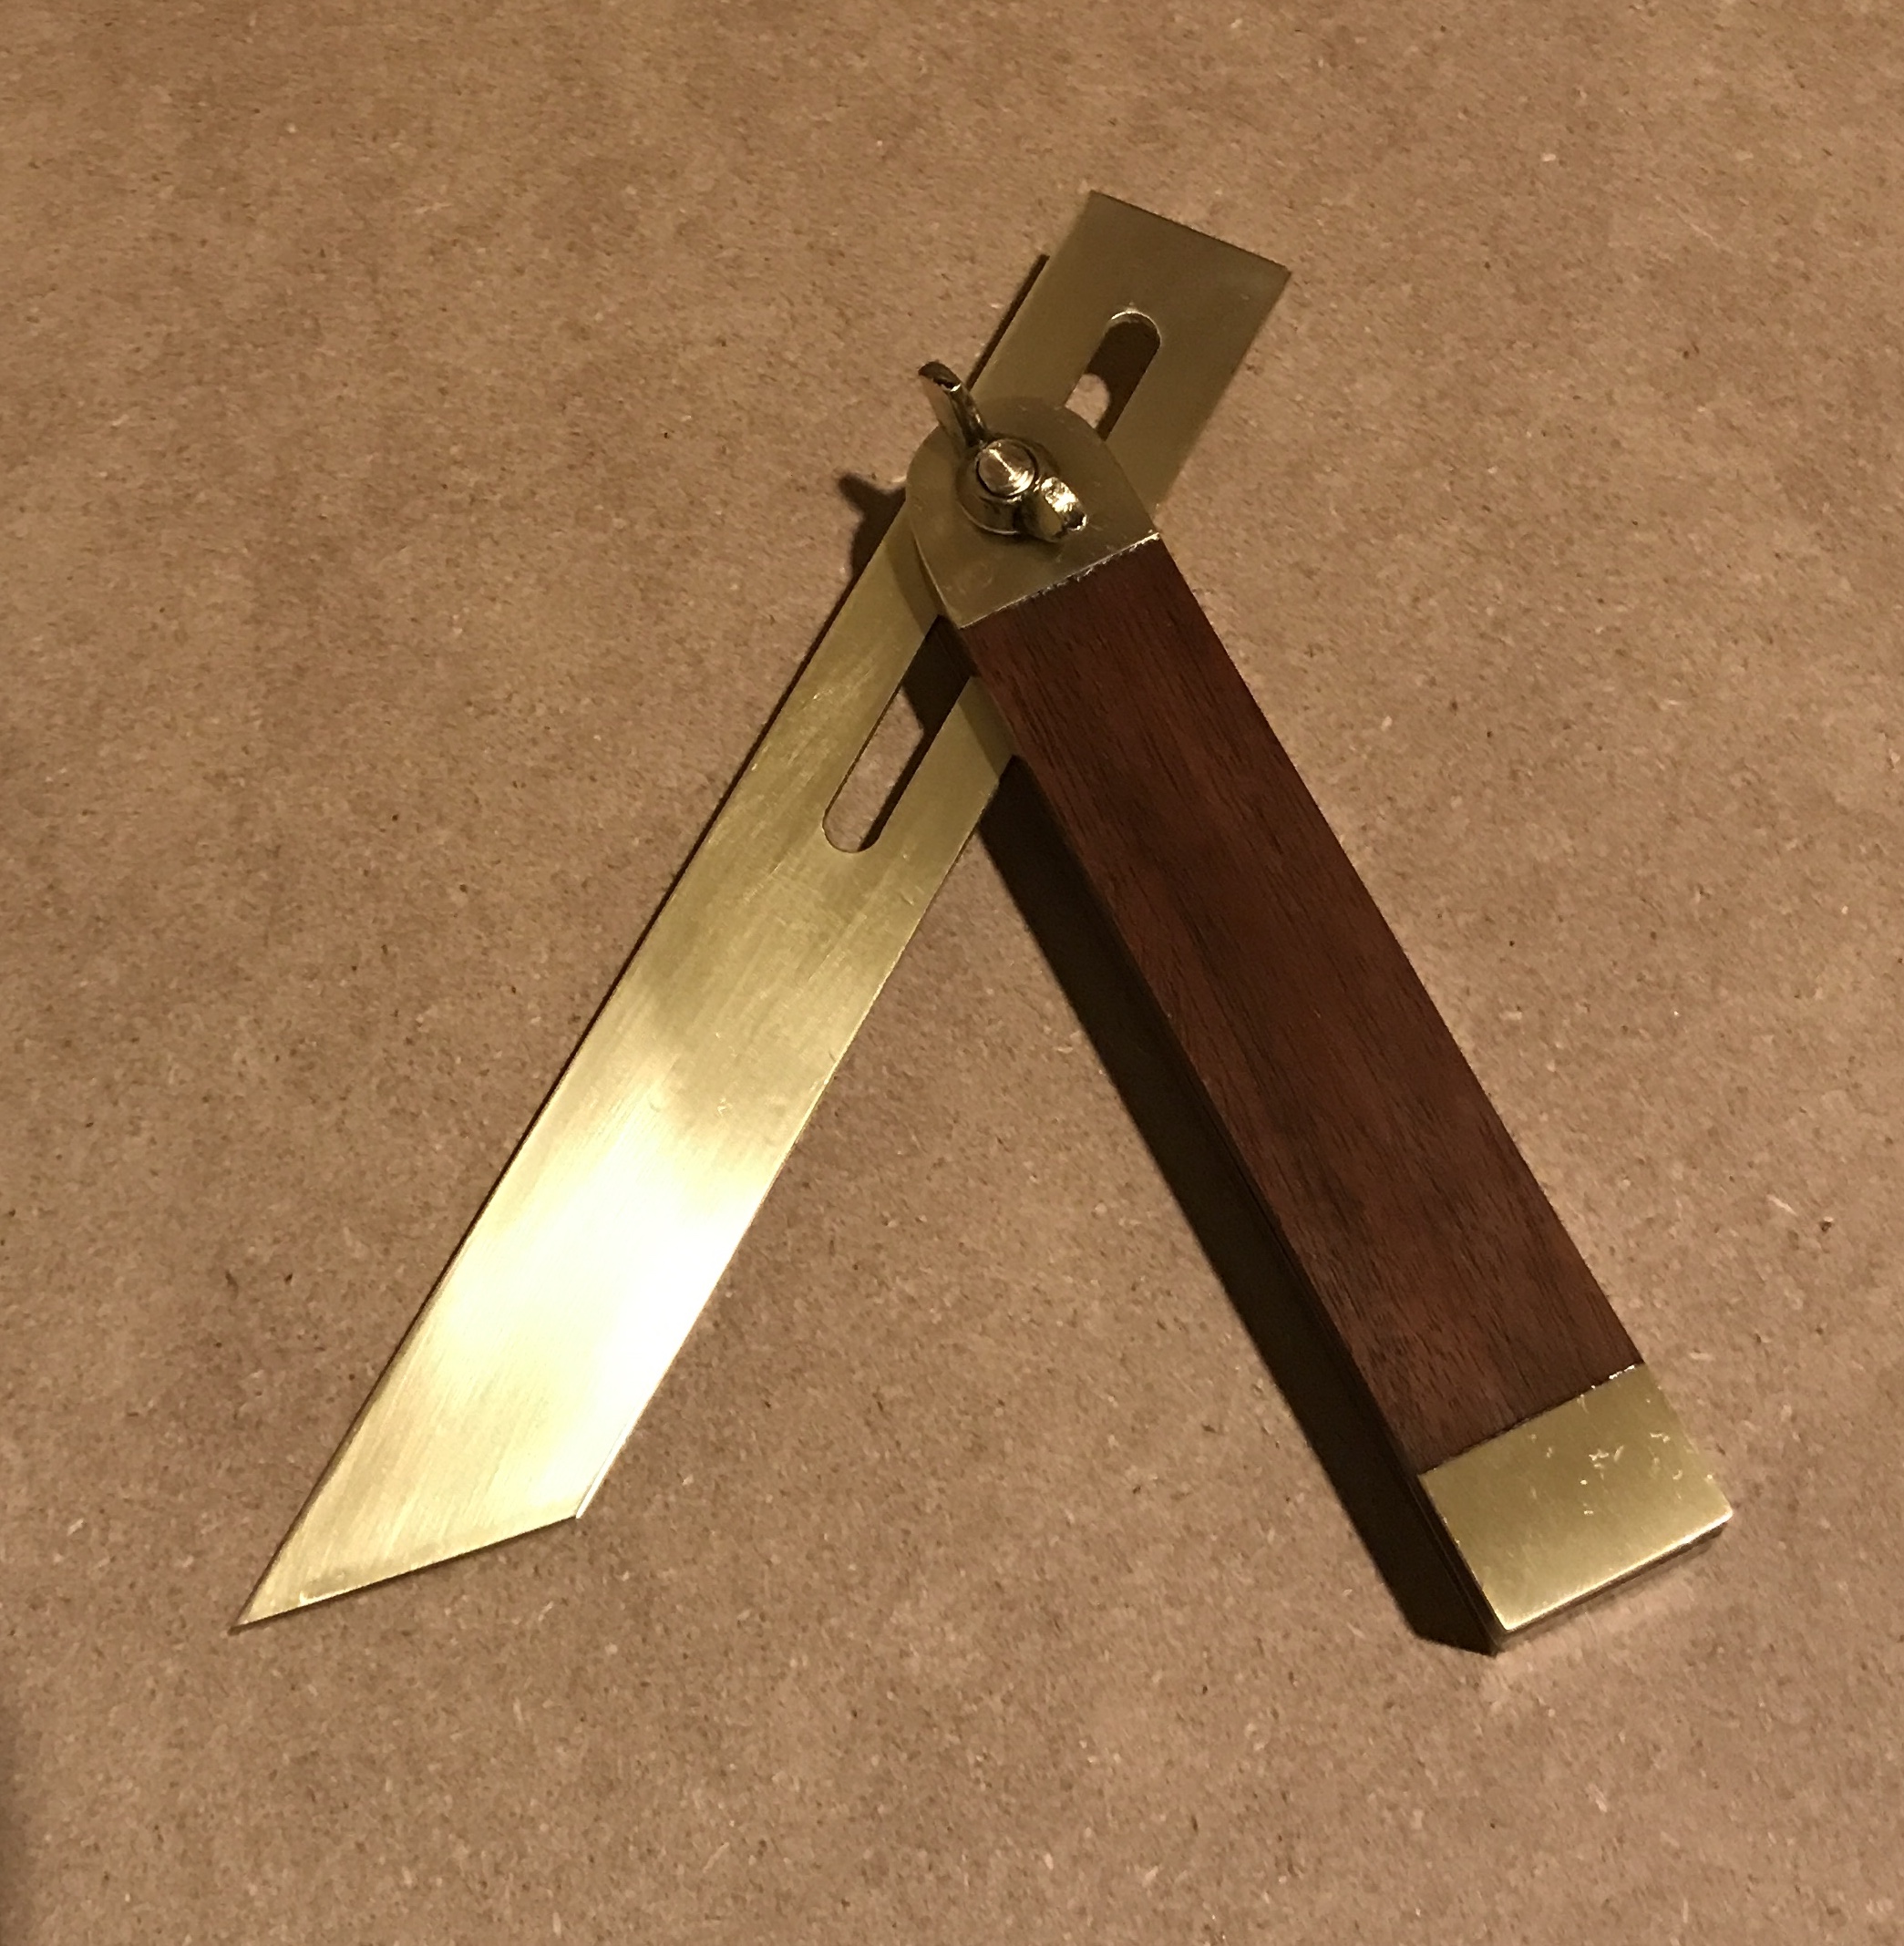
The sliding bevel gauge was just completed and led to this overview of heirloom tools. The sliding bevel gauge is used to transfer angles in woodworking. The handle was enjoyable to make. I like mating wood with metal. In this case small screws were used in one end and then filed to look like rivets. Rivets were used in the other end. For some reason I find using rivets to be very satisfying.
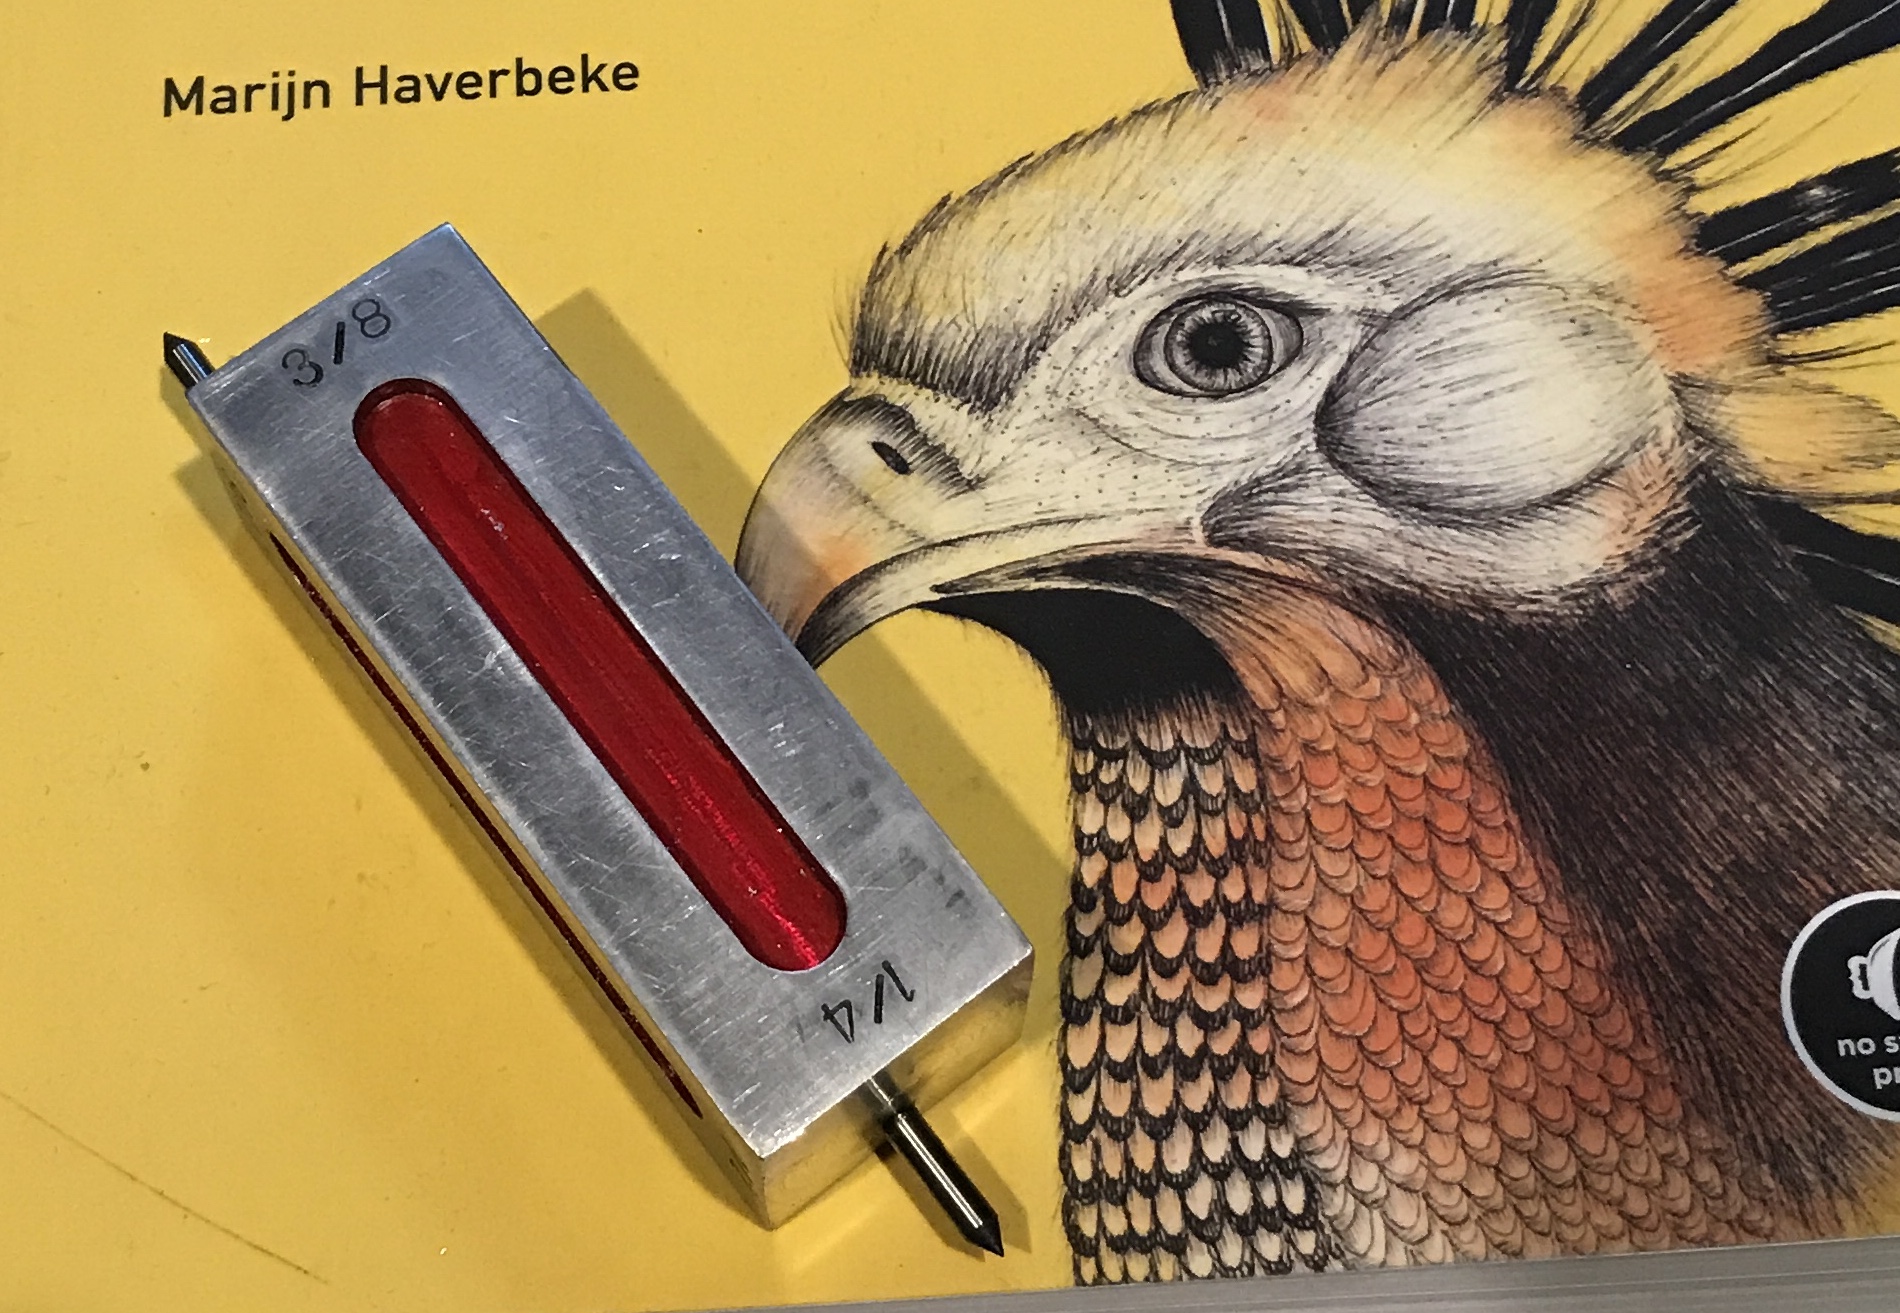
The red and yellow fixed marking blocks were never written up in either the early notebook nor in this electronic notebook. They also are for marking lines on metal. Each end has a hardened pin in a fixed position. This position in the 1" square block can mark four different heights. For instance the red block marks in increments of 1/8". The pin on one end is set so that it can mark 1/8", 3/8", 7/8", and 5/8" depending upon which face of the tool rests on the surface plate. The yellow tool marks increments of 1/16". I particularly enjoyed milling the decorative grooves in the sides.
The beginning of just about every metal part starts with marking the metal in places it needs to be cut or drilled. This is done a lot and that is why I have so many tools for performing this task. The tools shown here are not terribly accurate, but sufficient for 90% of the work I do. If I need more precision, then I use a Starrett height gauge and precision 1-2-3 blocks. This method can be accurate to the nearest 0.001" with care.
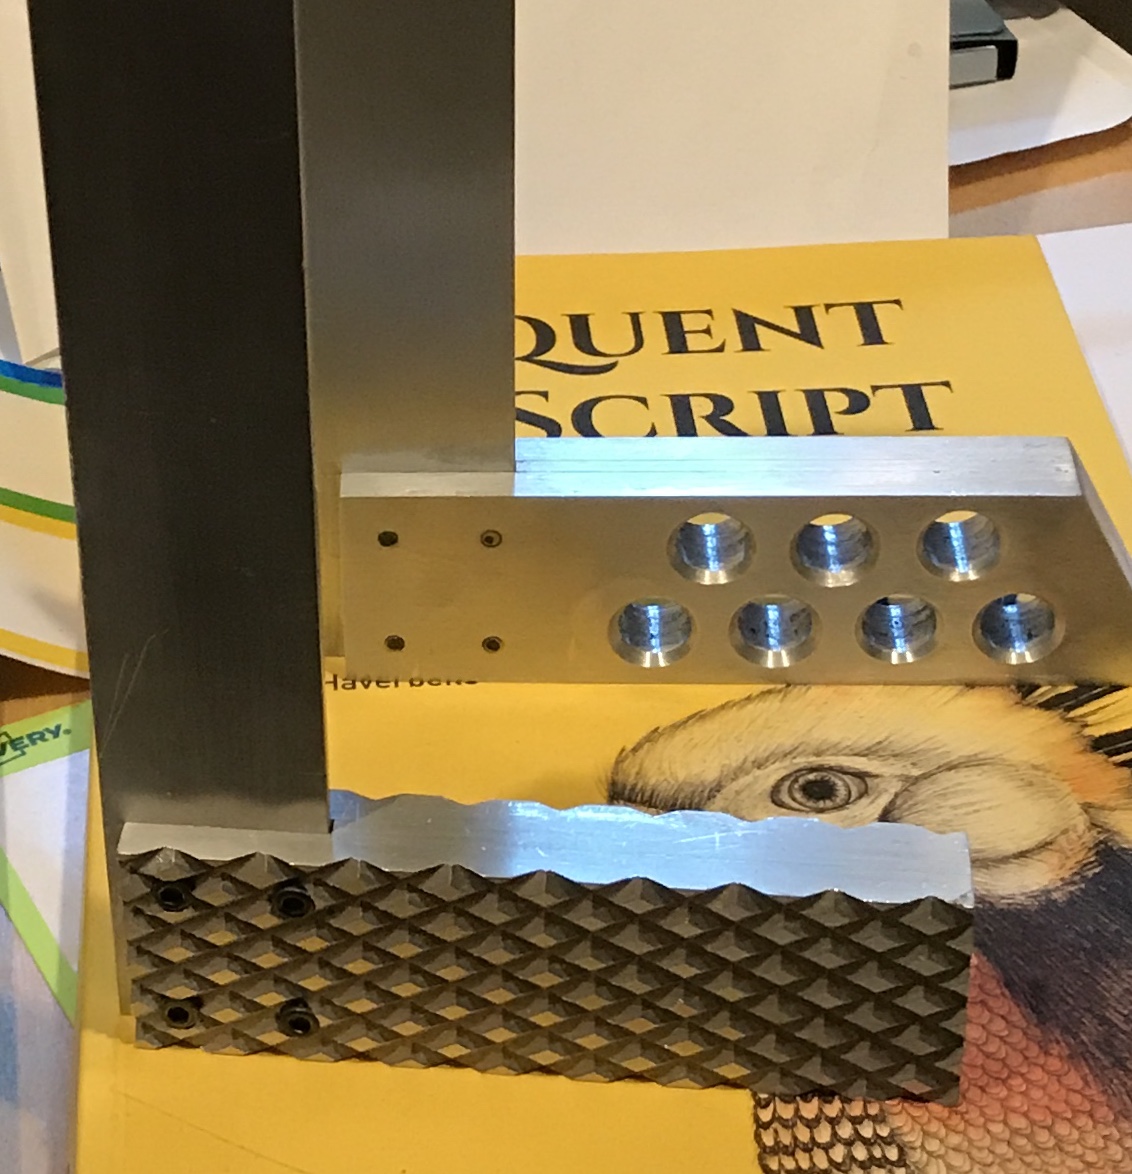
The two large squares were made a long time ago. There is also no write-up for these tools. They both can be adjusted very slightly, but they stay square once adjusted. I particularly enjoyed cutting the knurl on the frontmost square. It was done on the table saw!
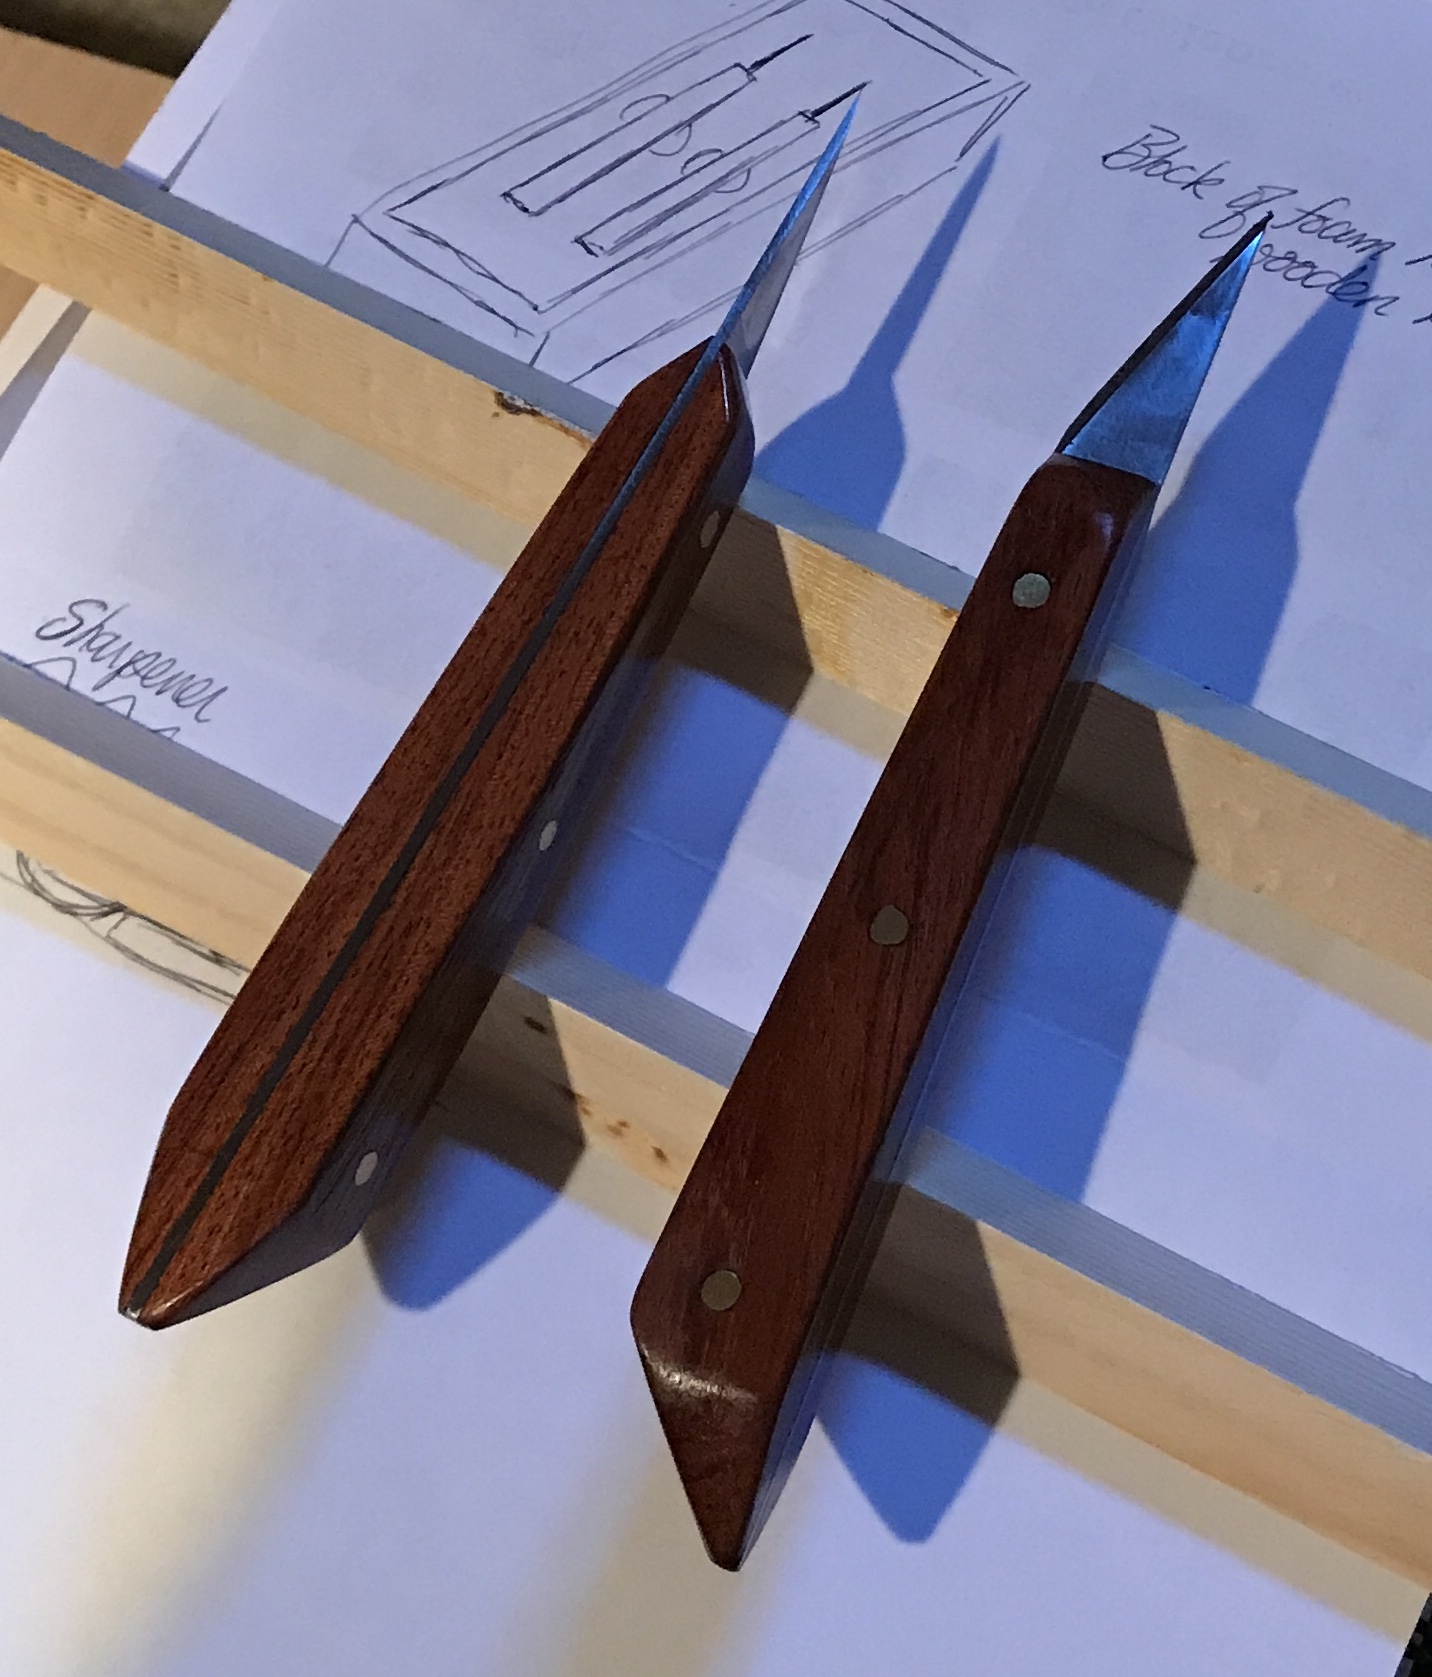
Another pair of tools, the marking knives were made in June, 2020. The blades were made from tool steel and hardened before grinding sharp. The blades are sharpened only on one face, opposite faces. This is so the bevel can be properly oriented when using the knives for marking wooden joints, like dovetails. Riveting the handles on and shaping the handles to fit my hands were quite satisfying tasks. They are extremely sharp and are stored in a fitted foam case.
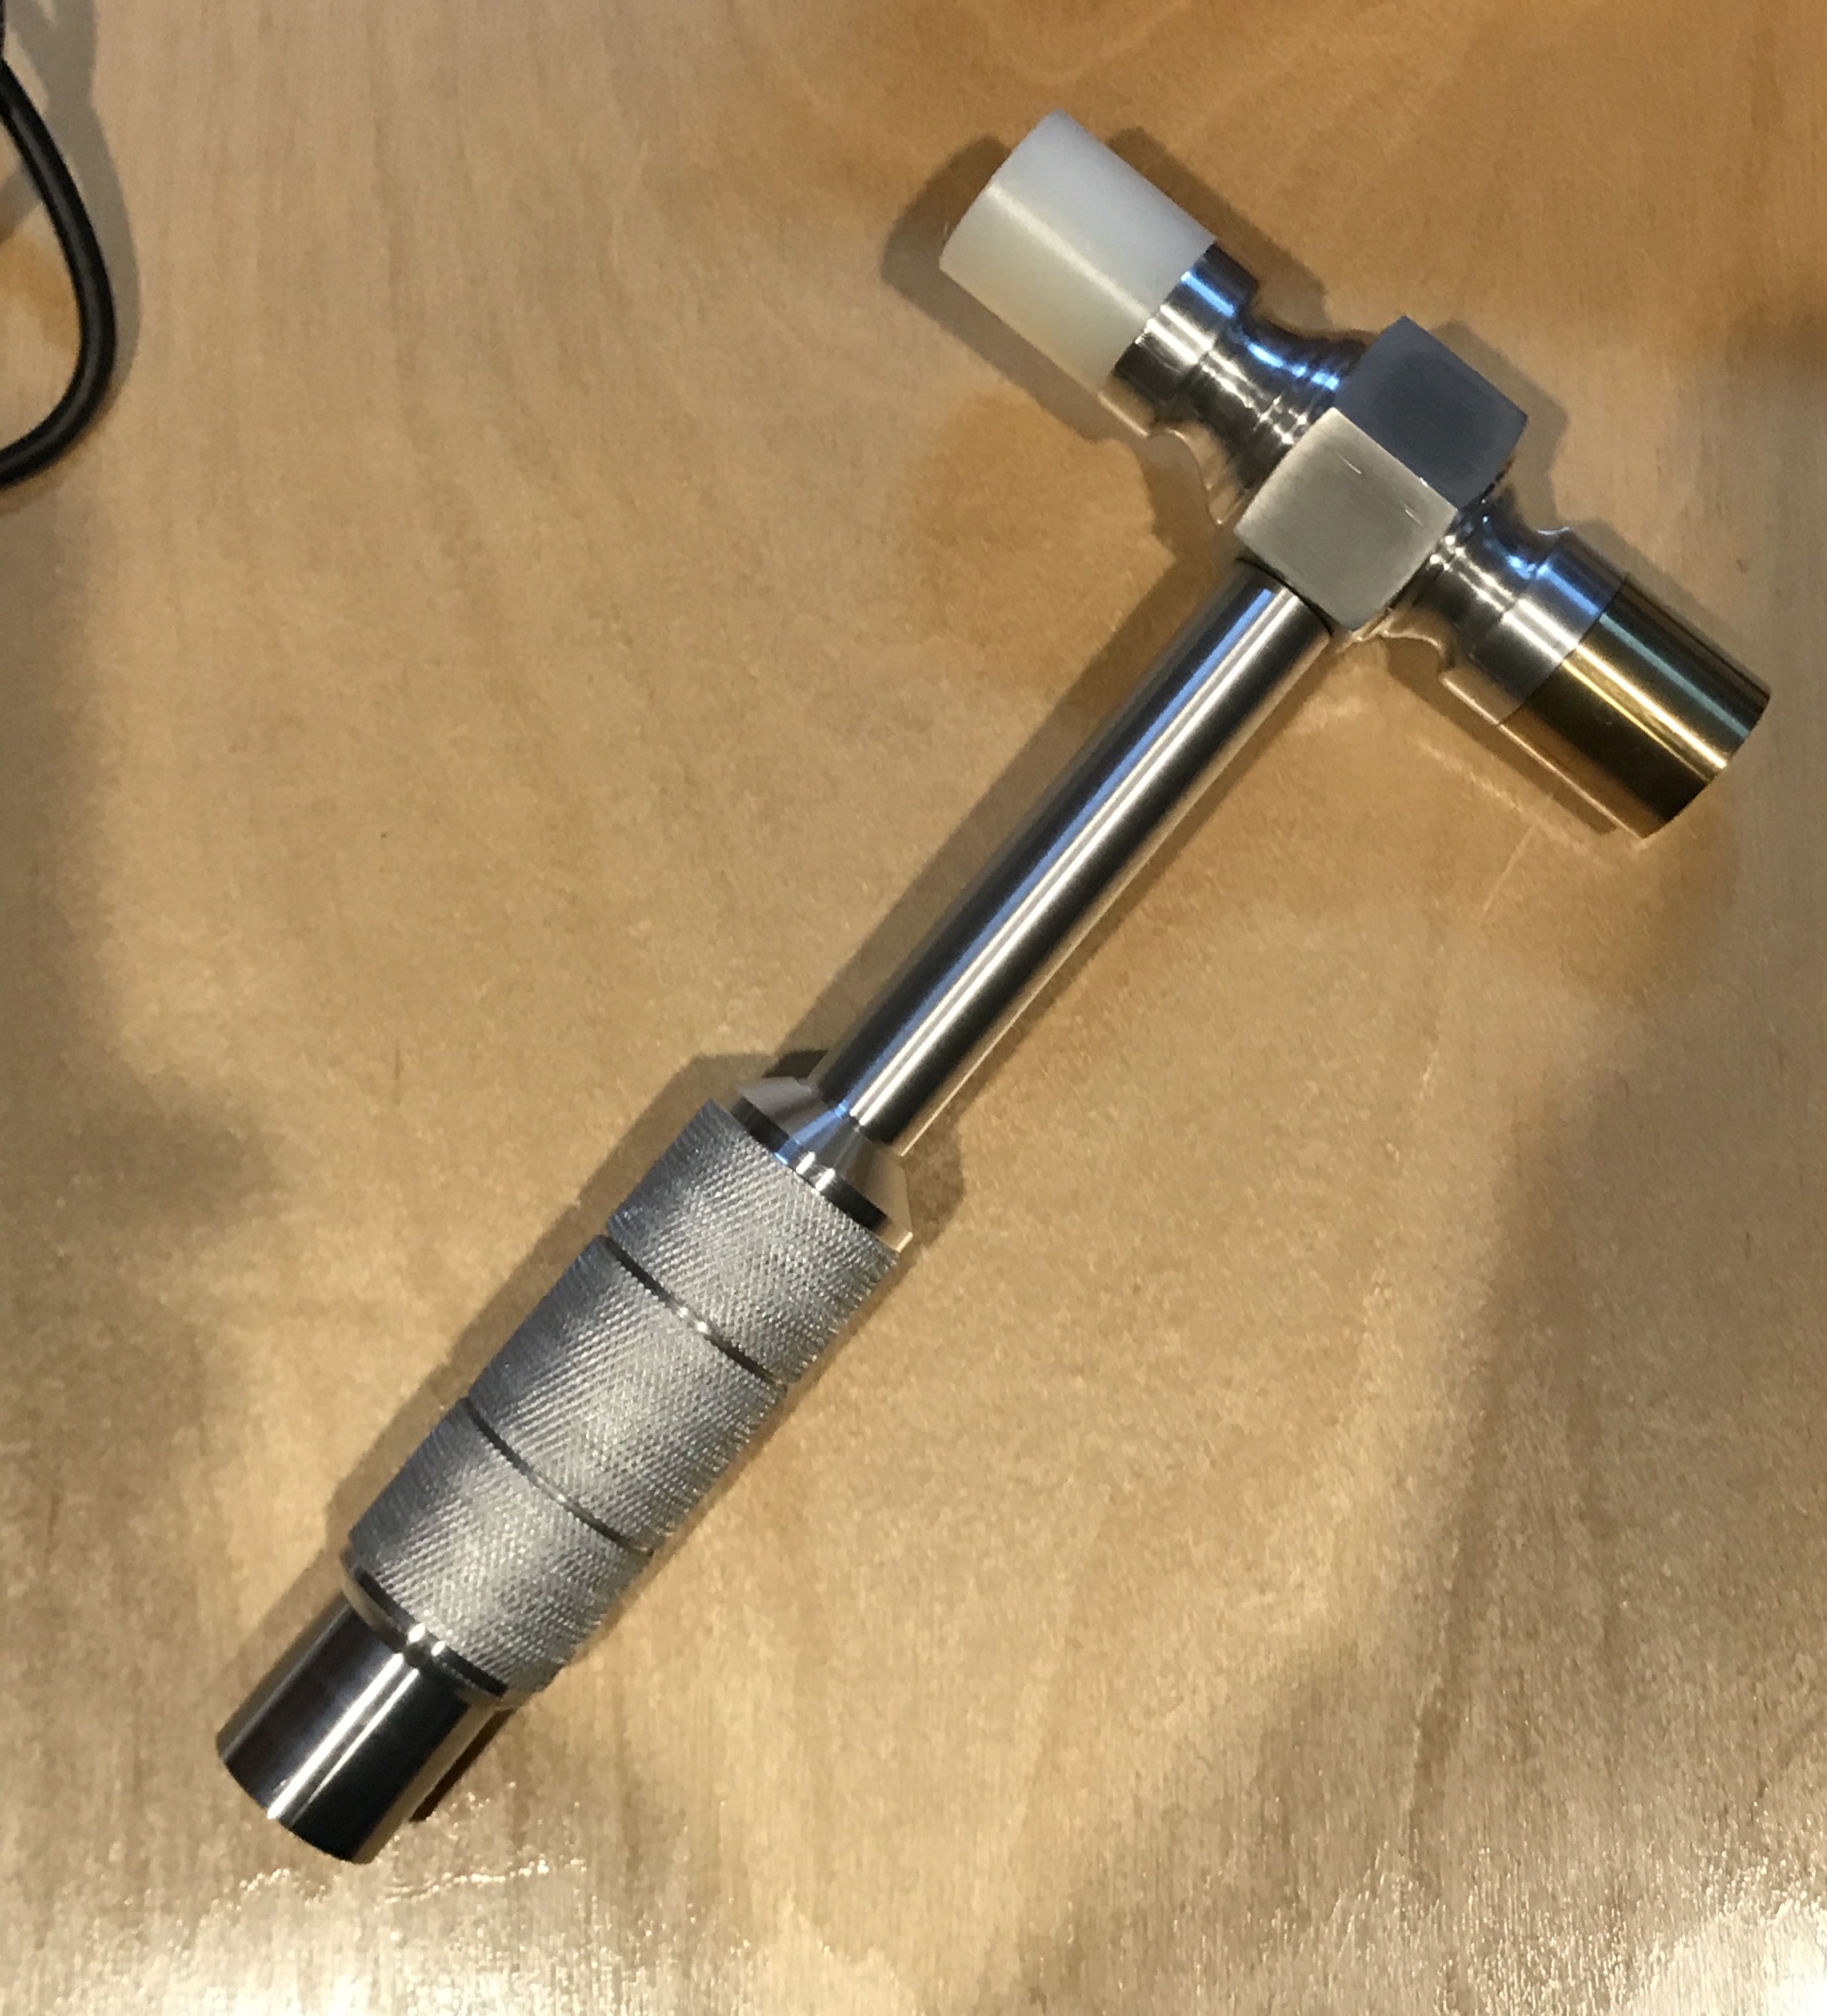
The soft-faced machinist's hammer was made in April of 2020. It has three soft interchangeable faces. One is brass, one is nylon, and the last is made of aluminum. Making the handle on the South Bend lathe was a lot of fun and was one of the first projects on the South Bend lathe. The aluminum face is stored at the bottom of the handle. All three faces are swapped by unscrewing and screwing into place.
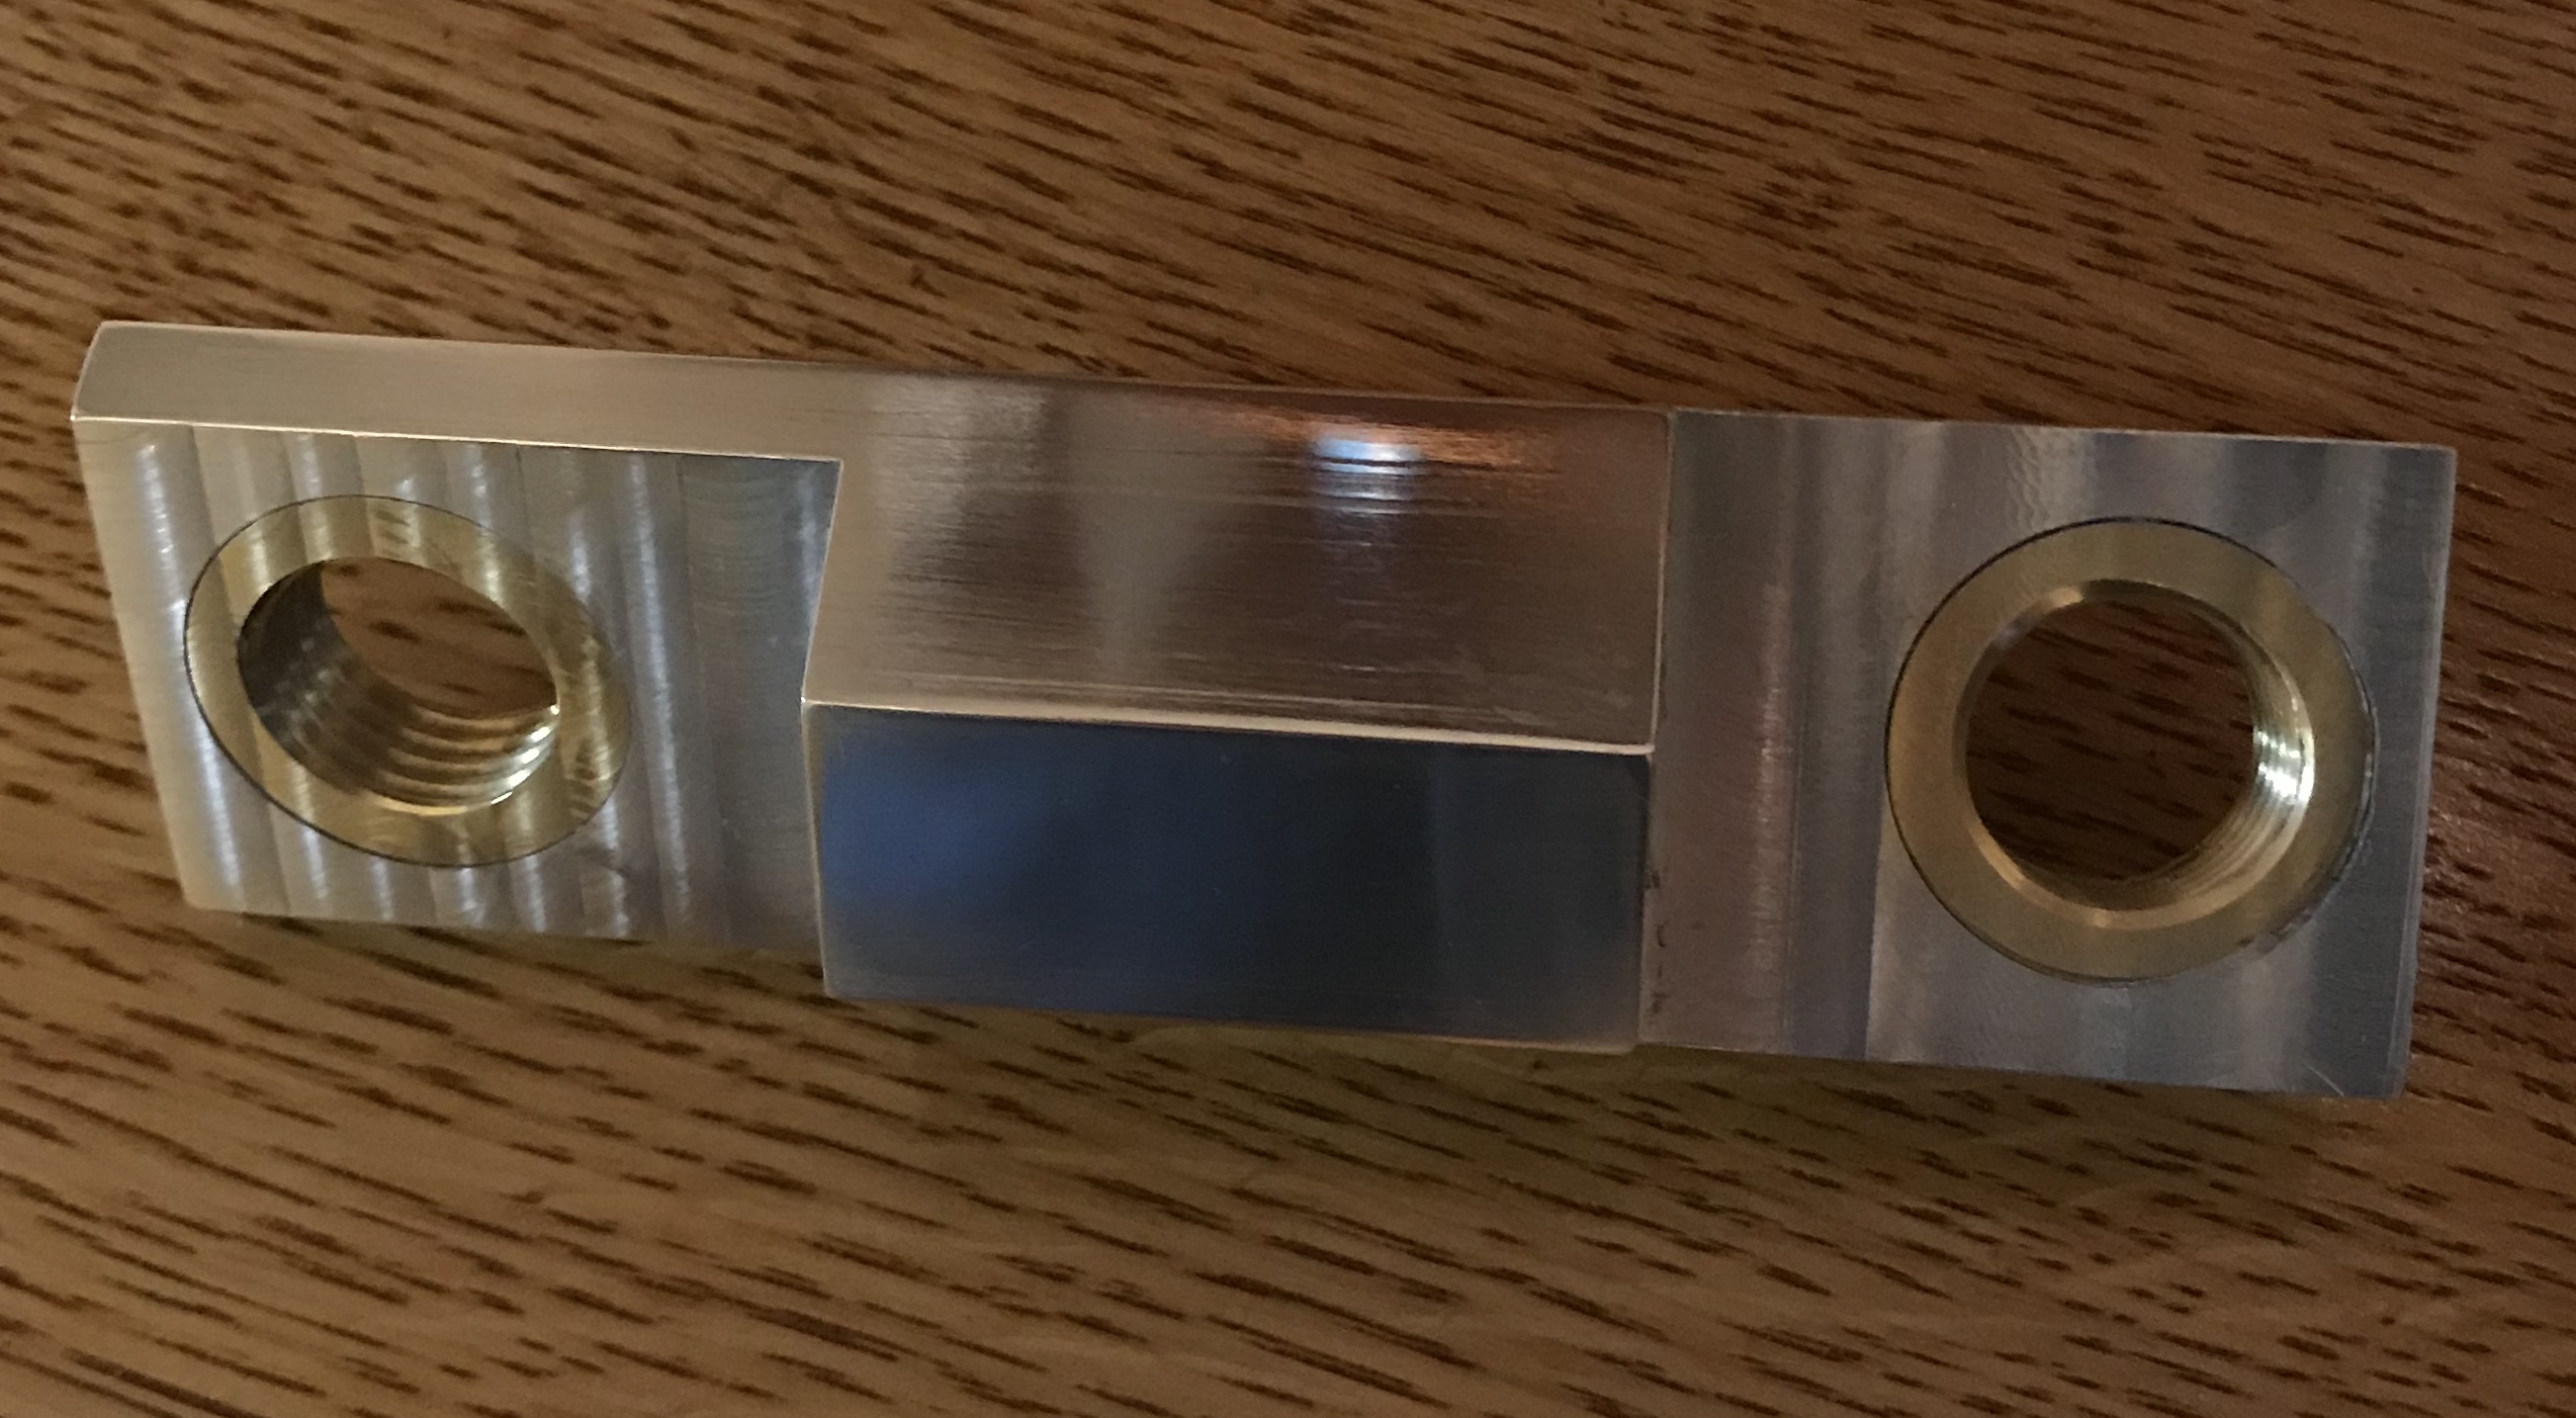
The tool on the far left is simply a jig to hold a Dremel with the vise in one of two angles. The Dremel clamp (December, 2018) is made from aluminum with brass inserts. Making the brass inserts was a fun challenge and required making a jig. I have yet to use the jig, but like it's looks.
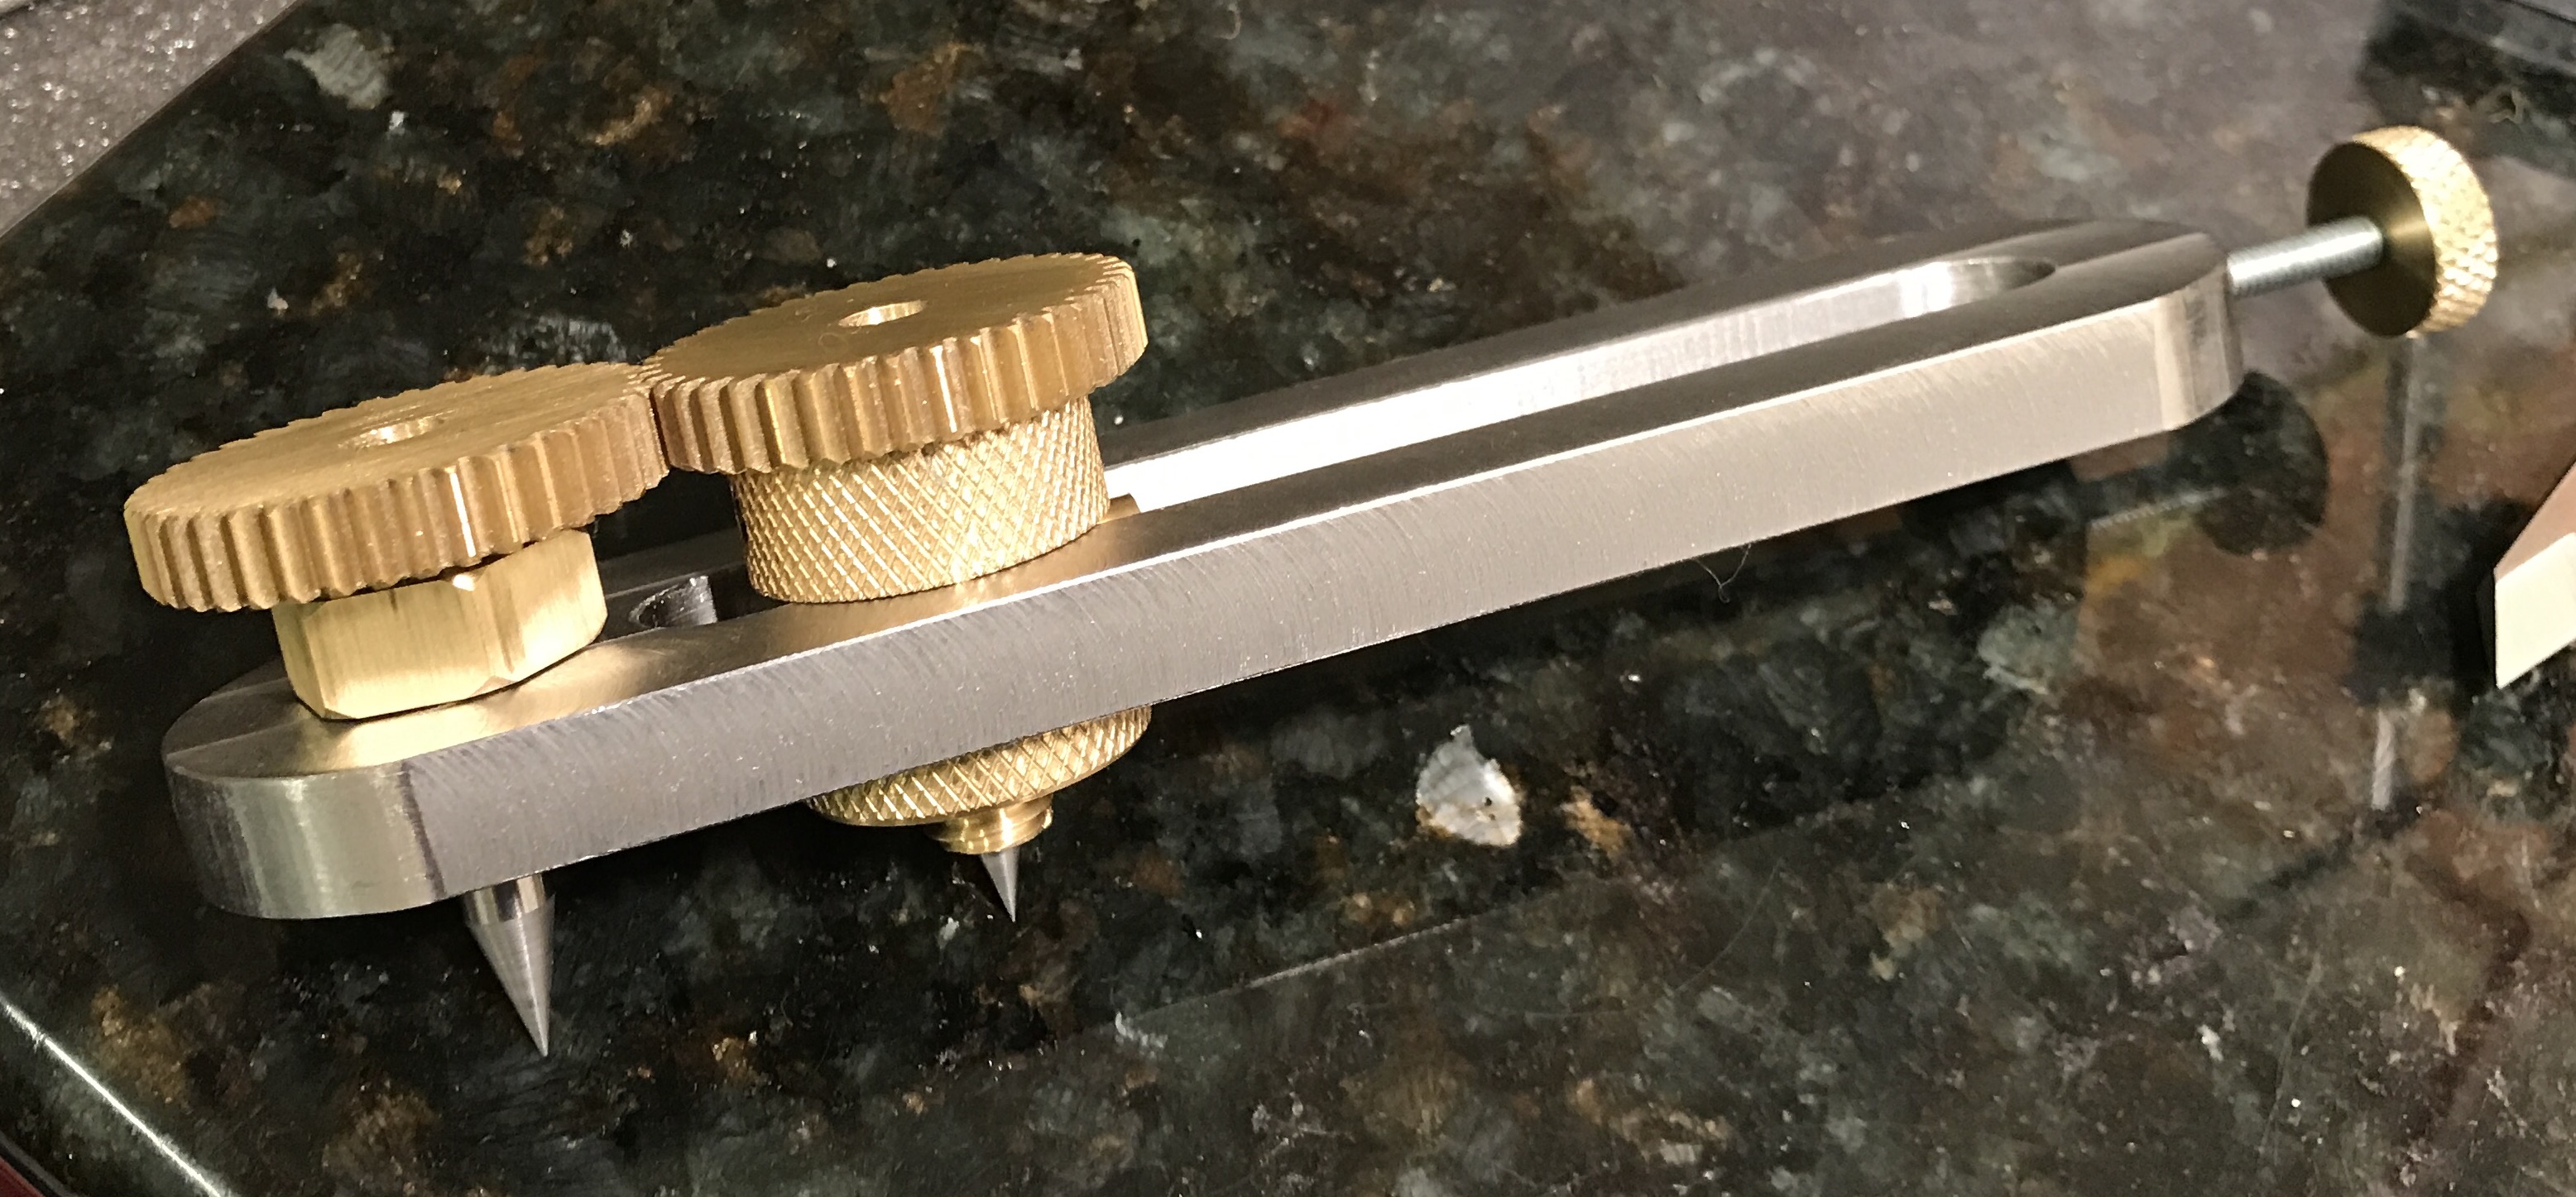
The depthing tool made in August, 2017 is next on the tour. A depthing tool is a clockmaker's jig for setting the distance between mating gears. I used it in the orrery. The gears are placed on pins and the separation of the pins is adjusted until the gears run smoothly. The adjustable pin is tightened in place and the hardened points are used to mark the metal for drilling holes for the shafts that hold the gears. I made some really nice knurls on screws for this tool.
One of my earliest projects is the adjustable square. It can be set to any length and when placed against a straight edge can be used to mark the work piece at the set distance. I like the way this tool always returns to square after tightening the screw. It was one of the first times I had sanded steel to such a high polish. After ten years it needs to be refinished.
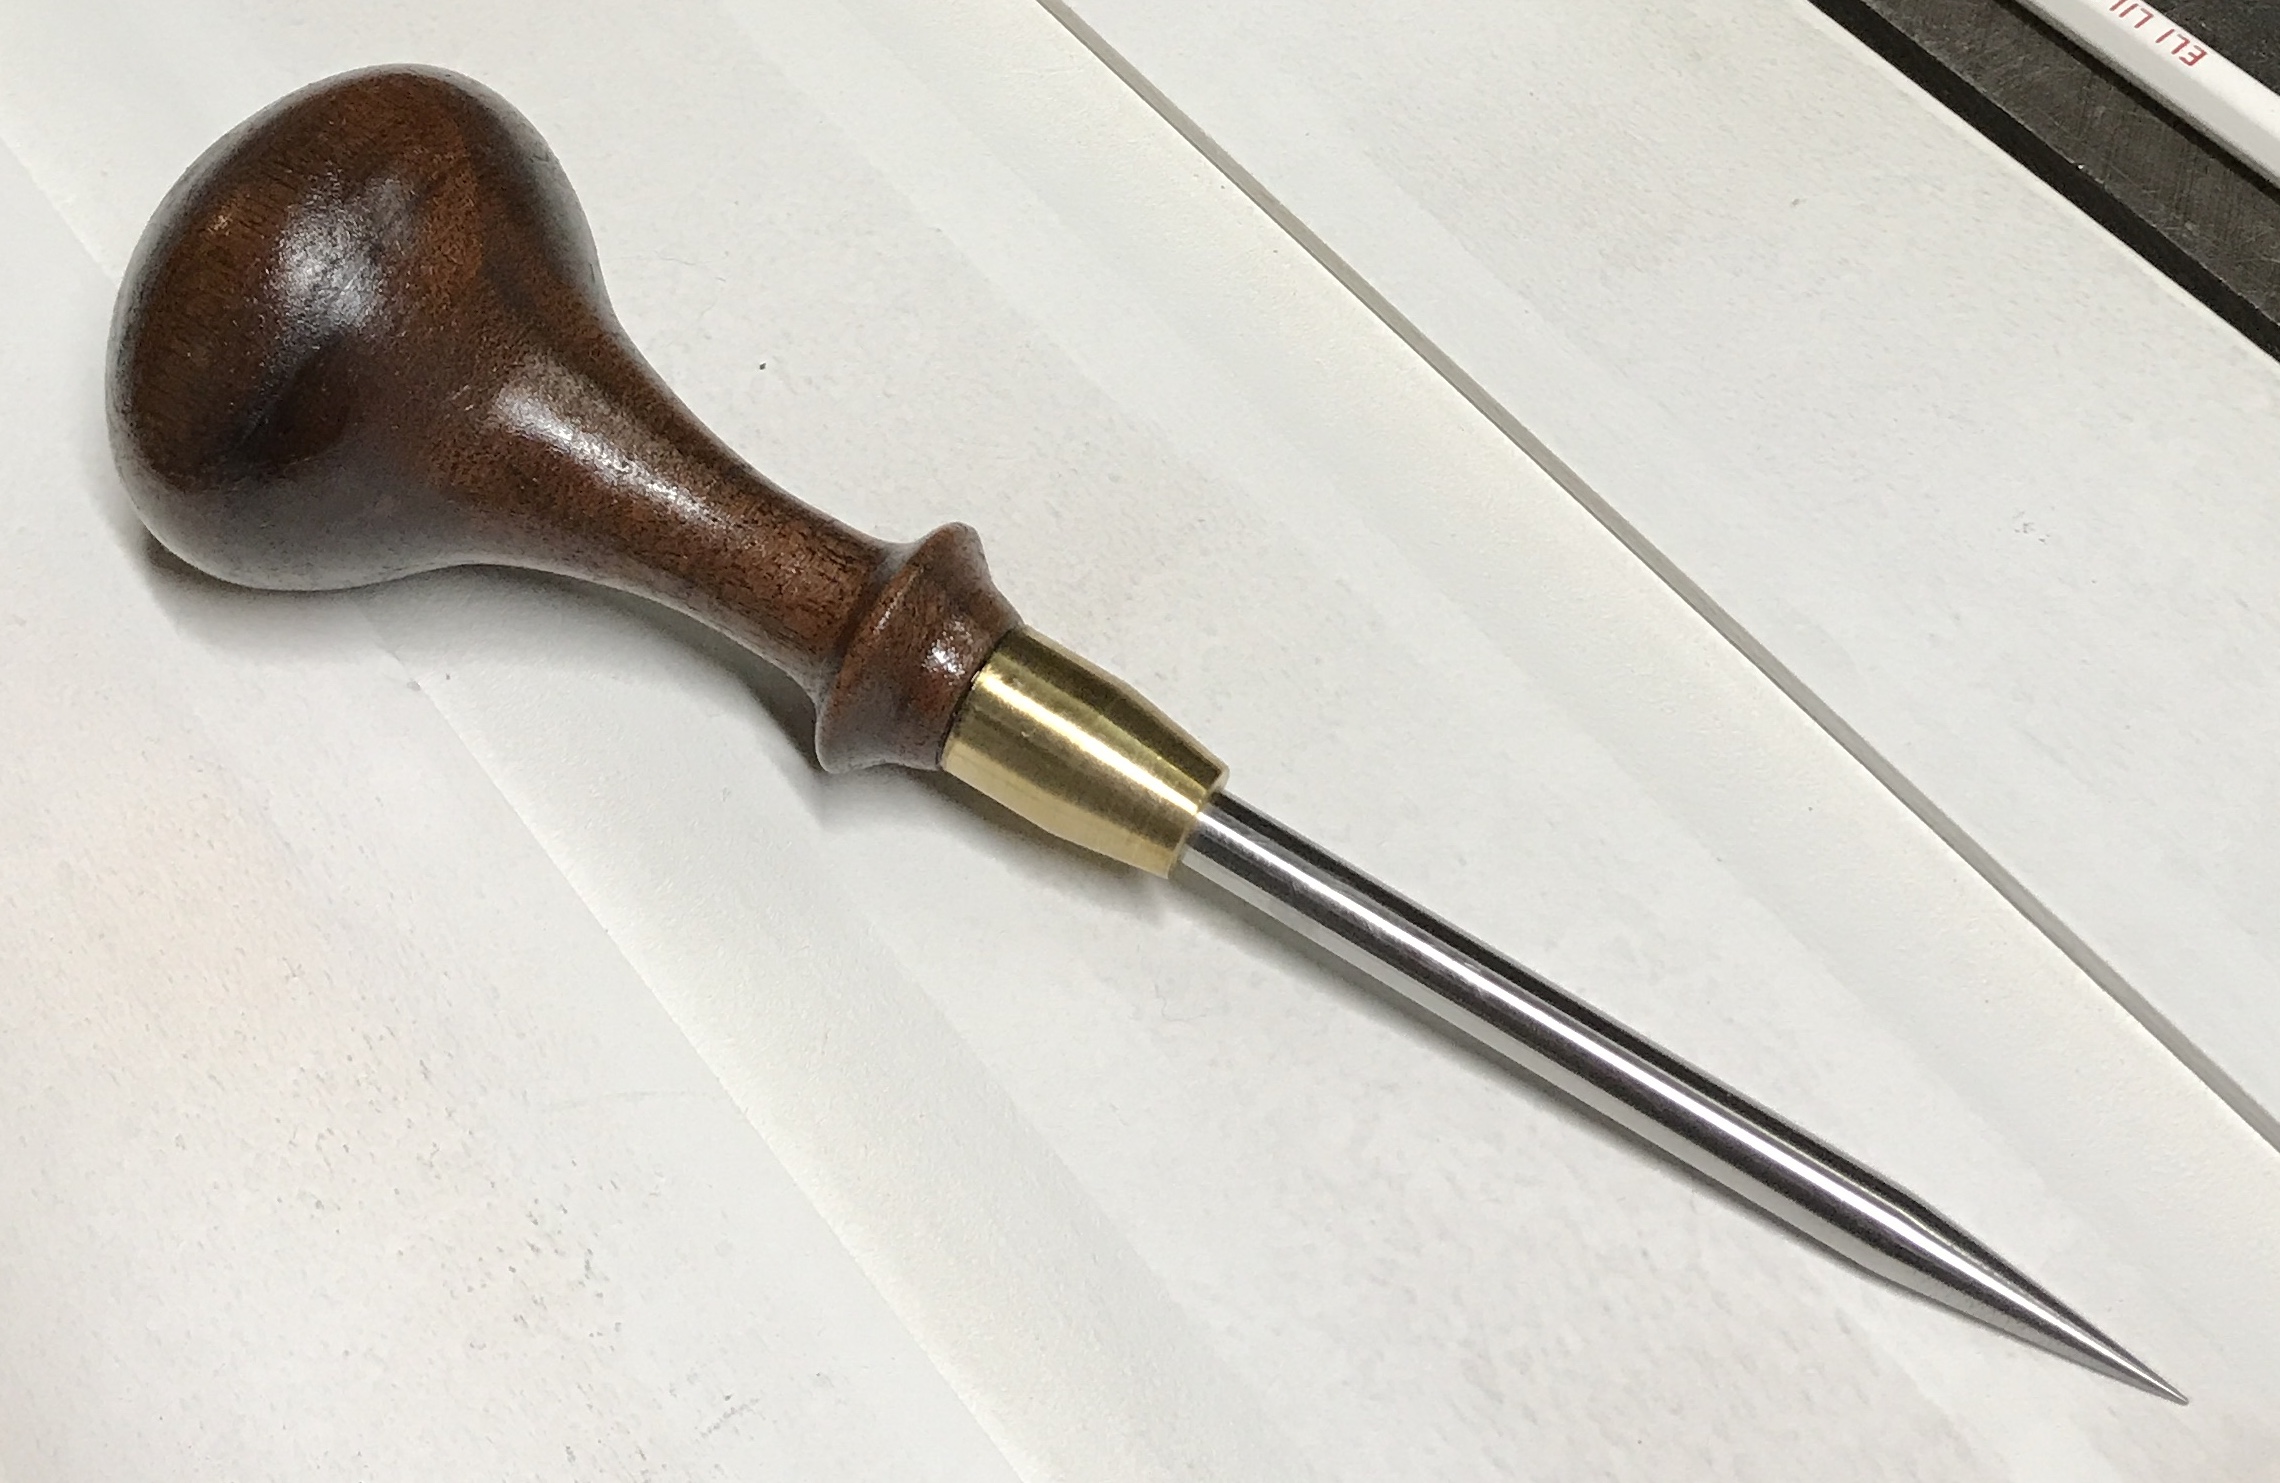
The awl was made for a mountain dulcimer making class that I was unable to attend. It was turned in May, 2020. Awls are used for scratching and marking wood for holes and cuts. This awl is made from wood and oil hardening steel with a brass ferrule. Making the handle on the lathe was new and fun. It was step cut first, then a rasp was used, followed by a round file. The awl is extremely sharp so it is stored with the point inserted in the cork from a Blanton's whiskey bottle.
The final tool is a sensitive drilling jig. When drilling small holes in metal, 1/16" or smaller, it is very easy to break the drill. In order to avoid breakage the drill needs to be pulled from the hole frequently to dislodge stuck chips. Using this jig it is easy to remove the drill from the hole and you can "feel" when the drill is starting to bind. The jig has a spring and a ball bearing in it. You hold the round feature with the cutouts while the drill spins and push the drill down by hand into the metal. I really like the design of this jig. This tool was written up in the notebook, but has not been transferred to the electronic notebook. The drilling jig in the photo below has a drill chuck attached. The chuck is holding my smallest drill, #60, at 0.040" diameter.